chrome extension deploy - 02
깃액션을 통해서 앱을 자동으로 올려보자.
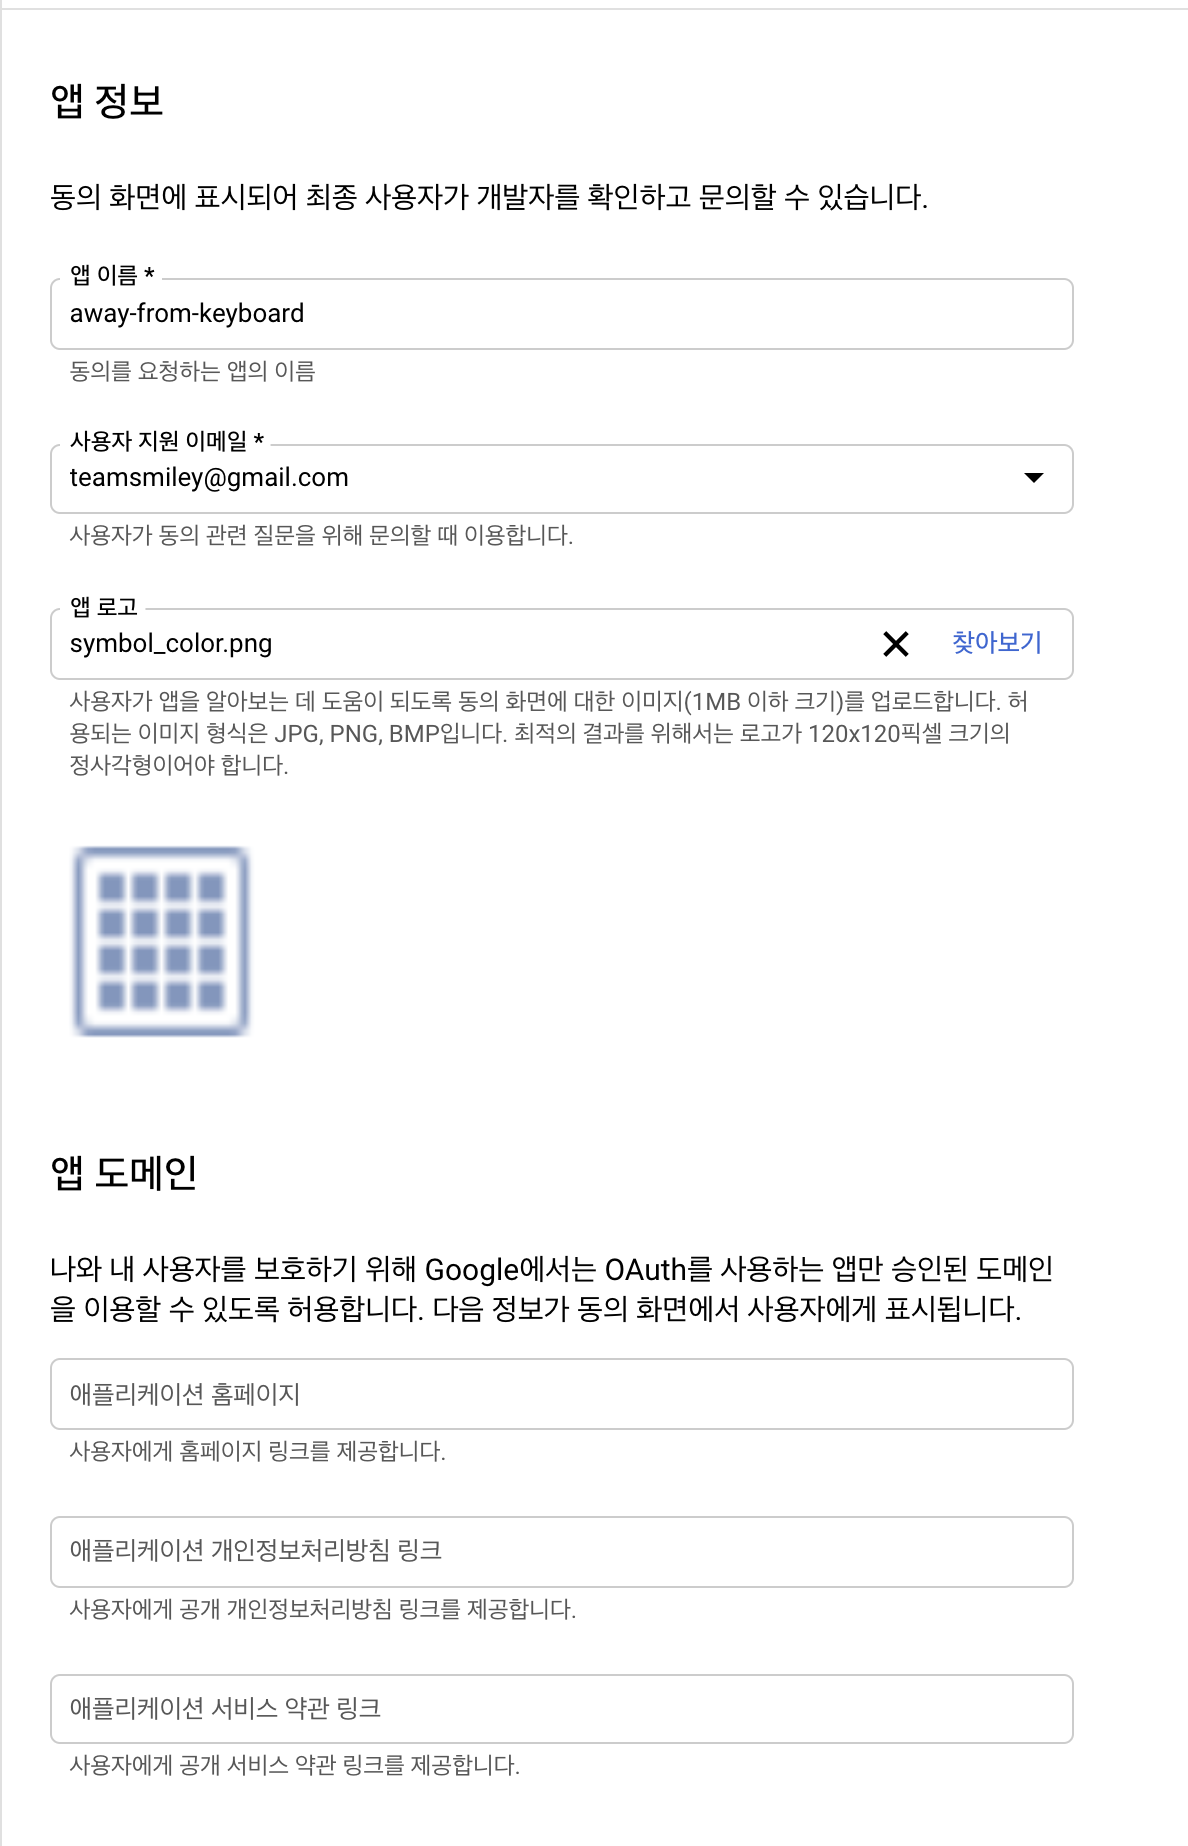
google developer에 등록
본인 이메일로 등록한다.
https://developers.google.com/
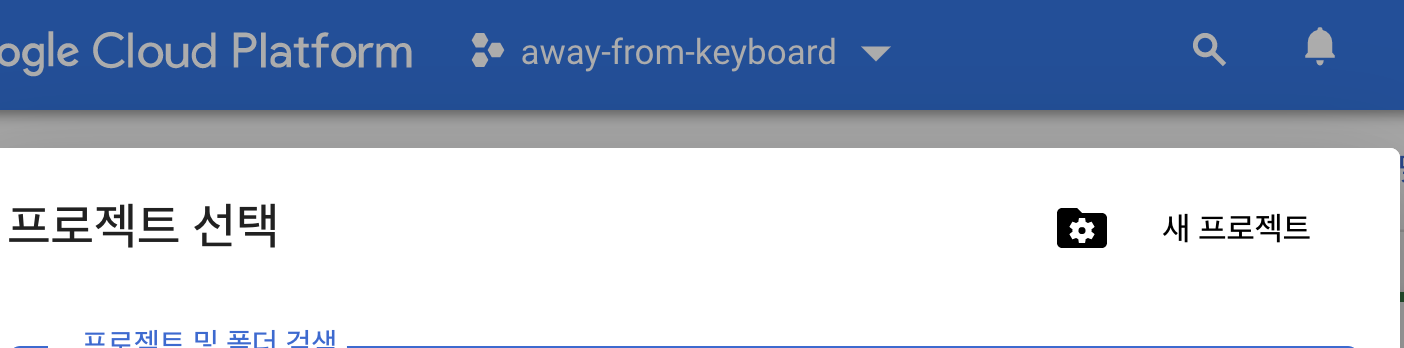
google cloud developer에서 프로젝트를 생성
구글 디벨로퍼 사이트에서 구글 클라우드를 클릭하고 console 을 찾아서 들어간다.
https://console.cloud.google.com/ 여기에 직접 들어가도 된다.
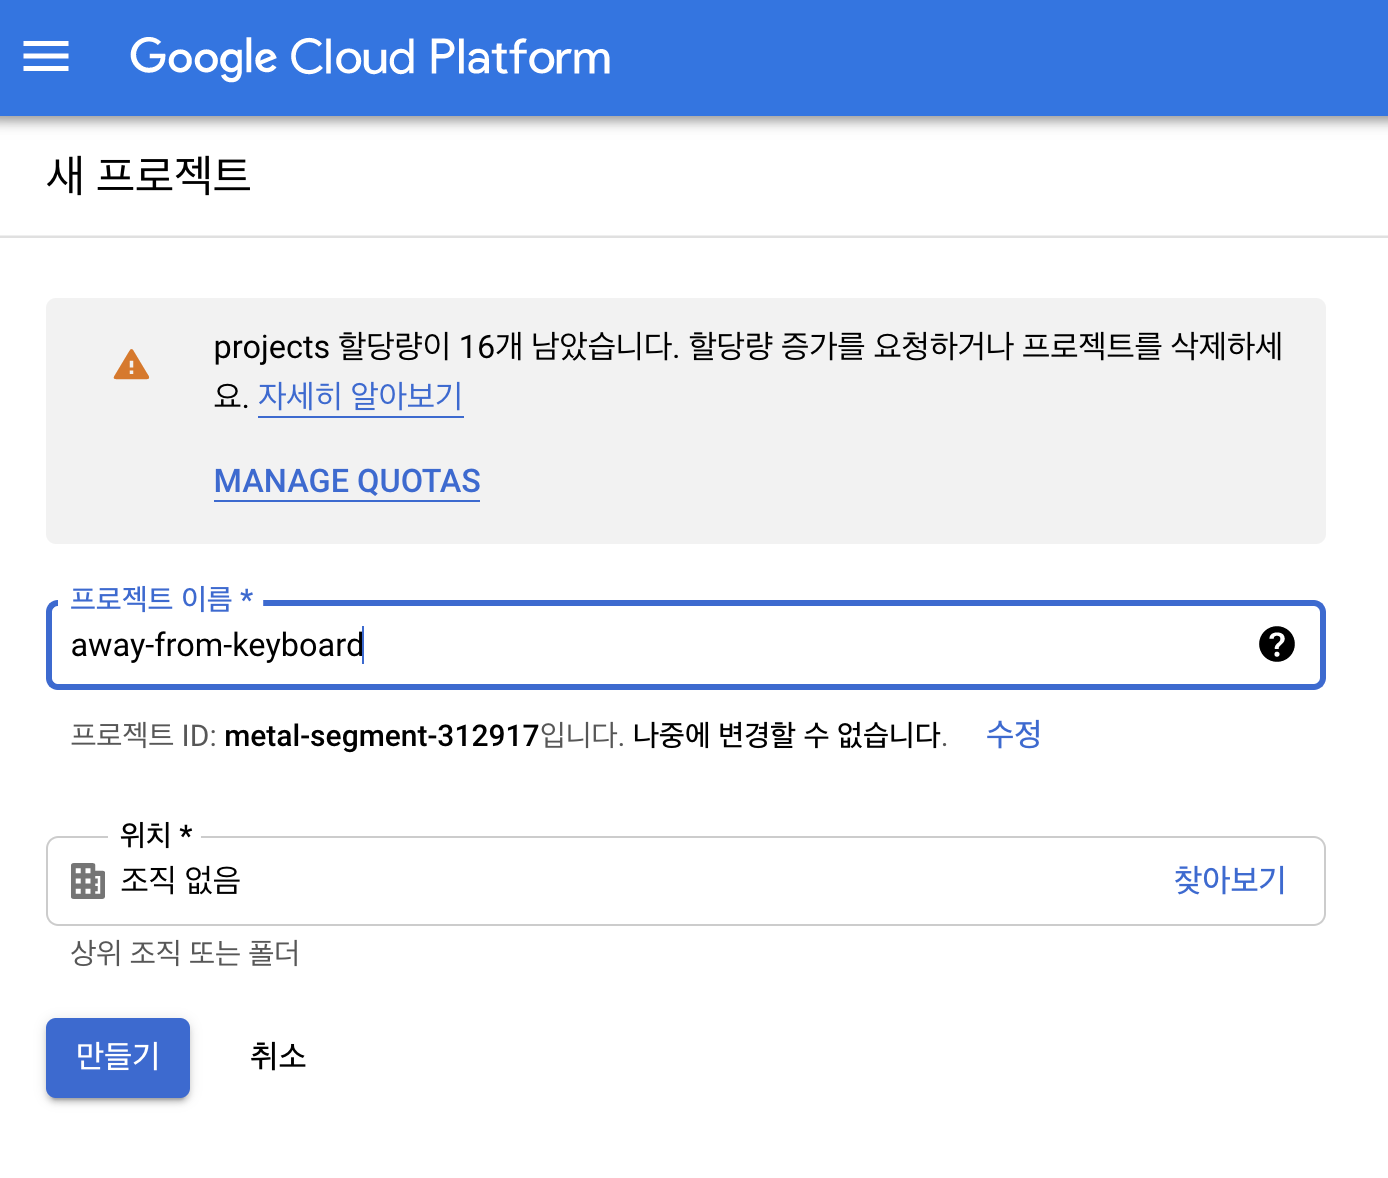
이제 프로젝트를 하나 만든다.
새 프로젝트 클릭
away-from-keyboard 으로 하나 만들자.
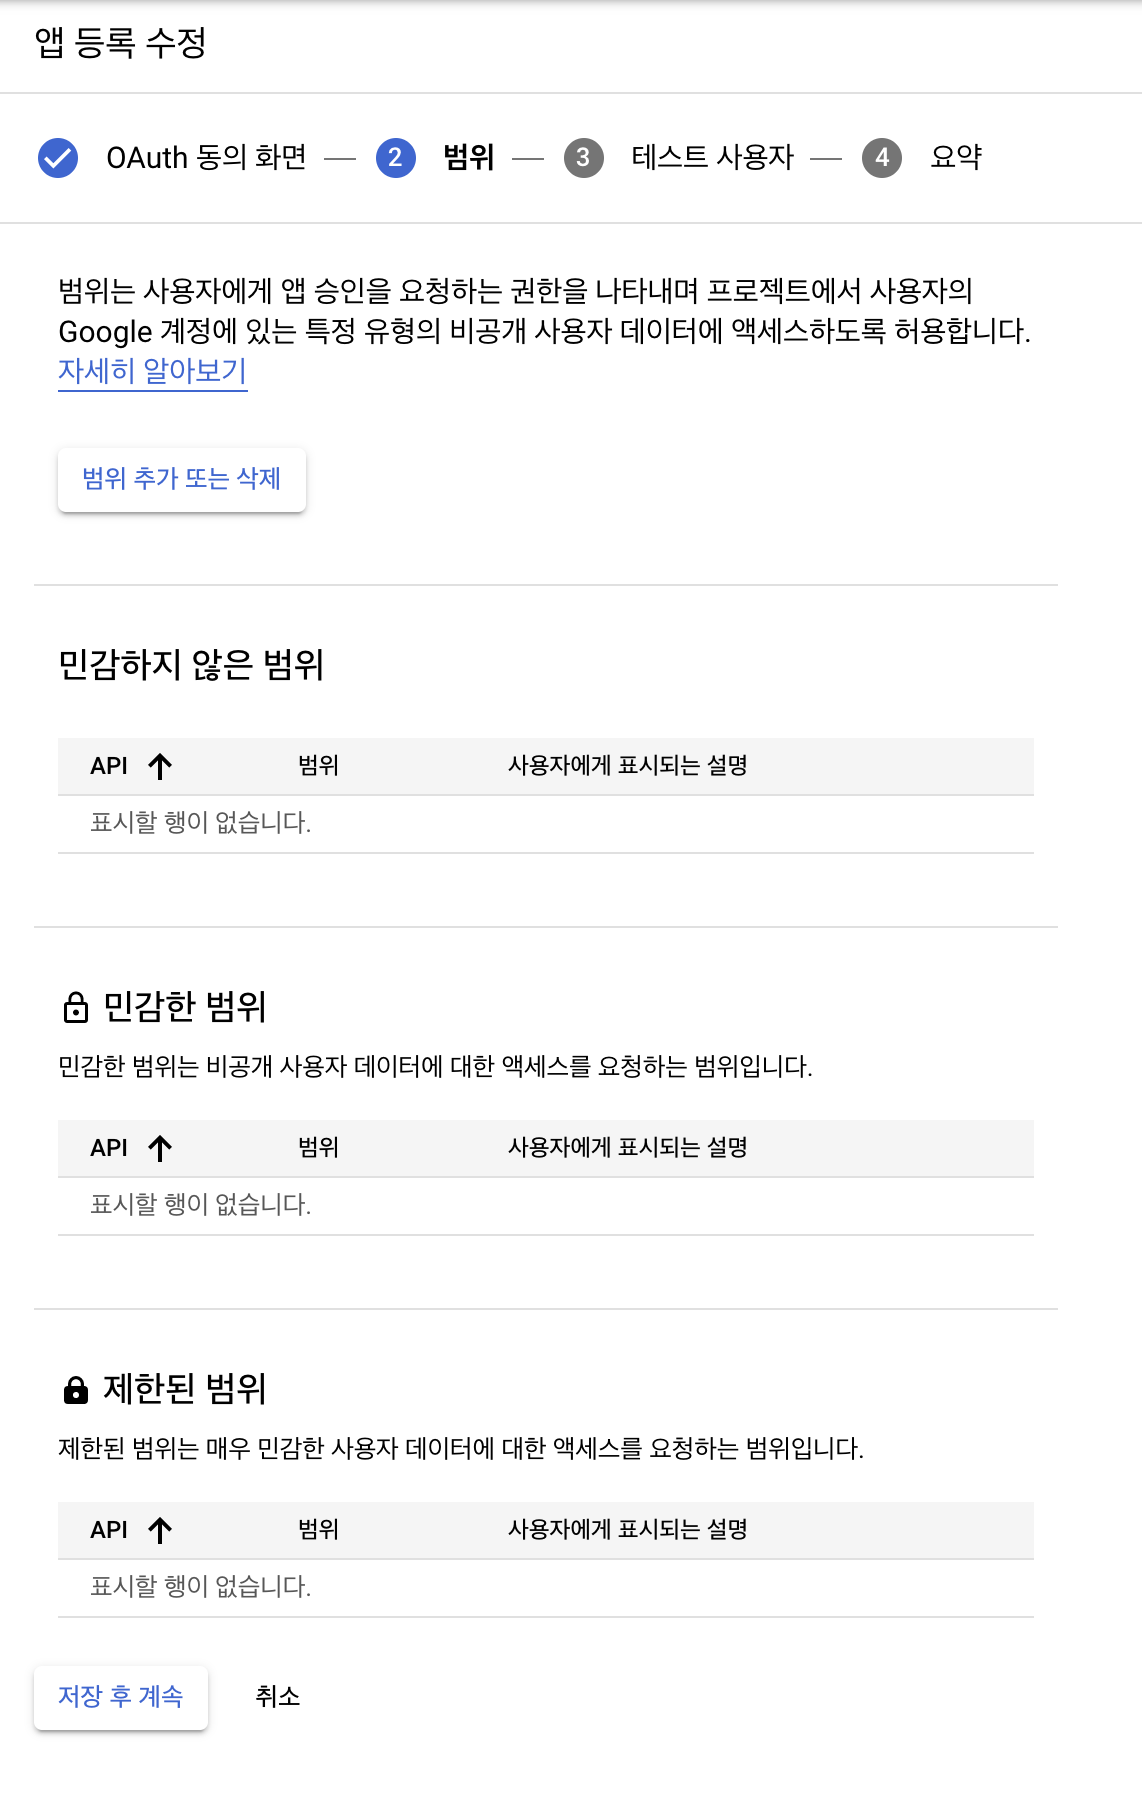
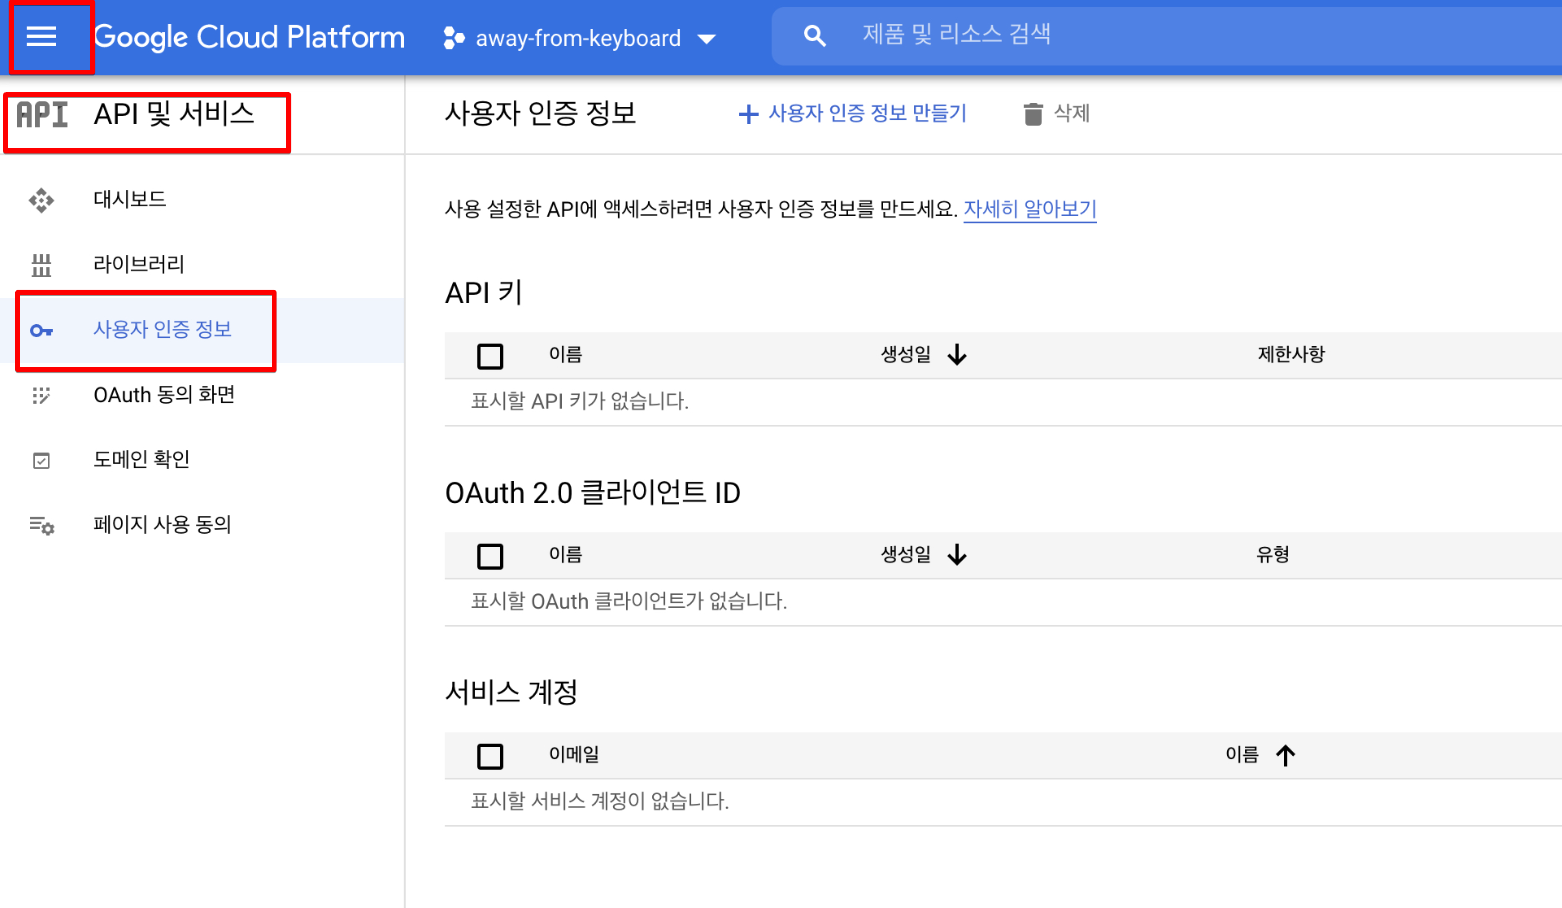
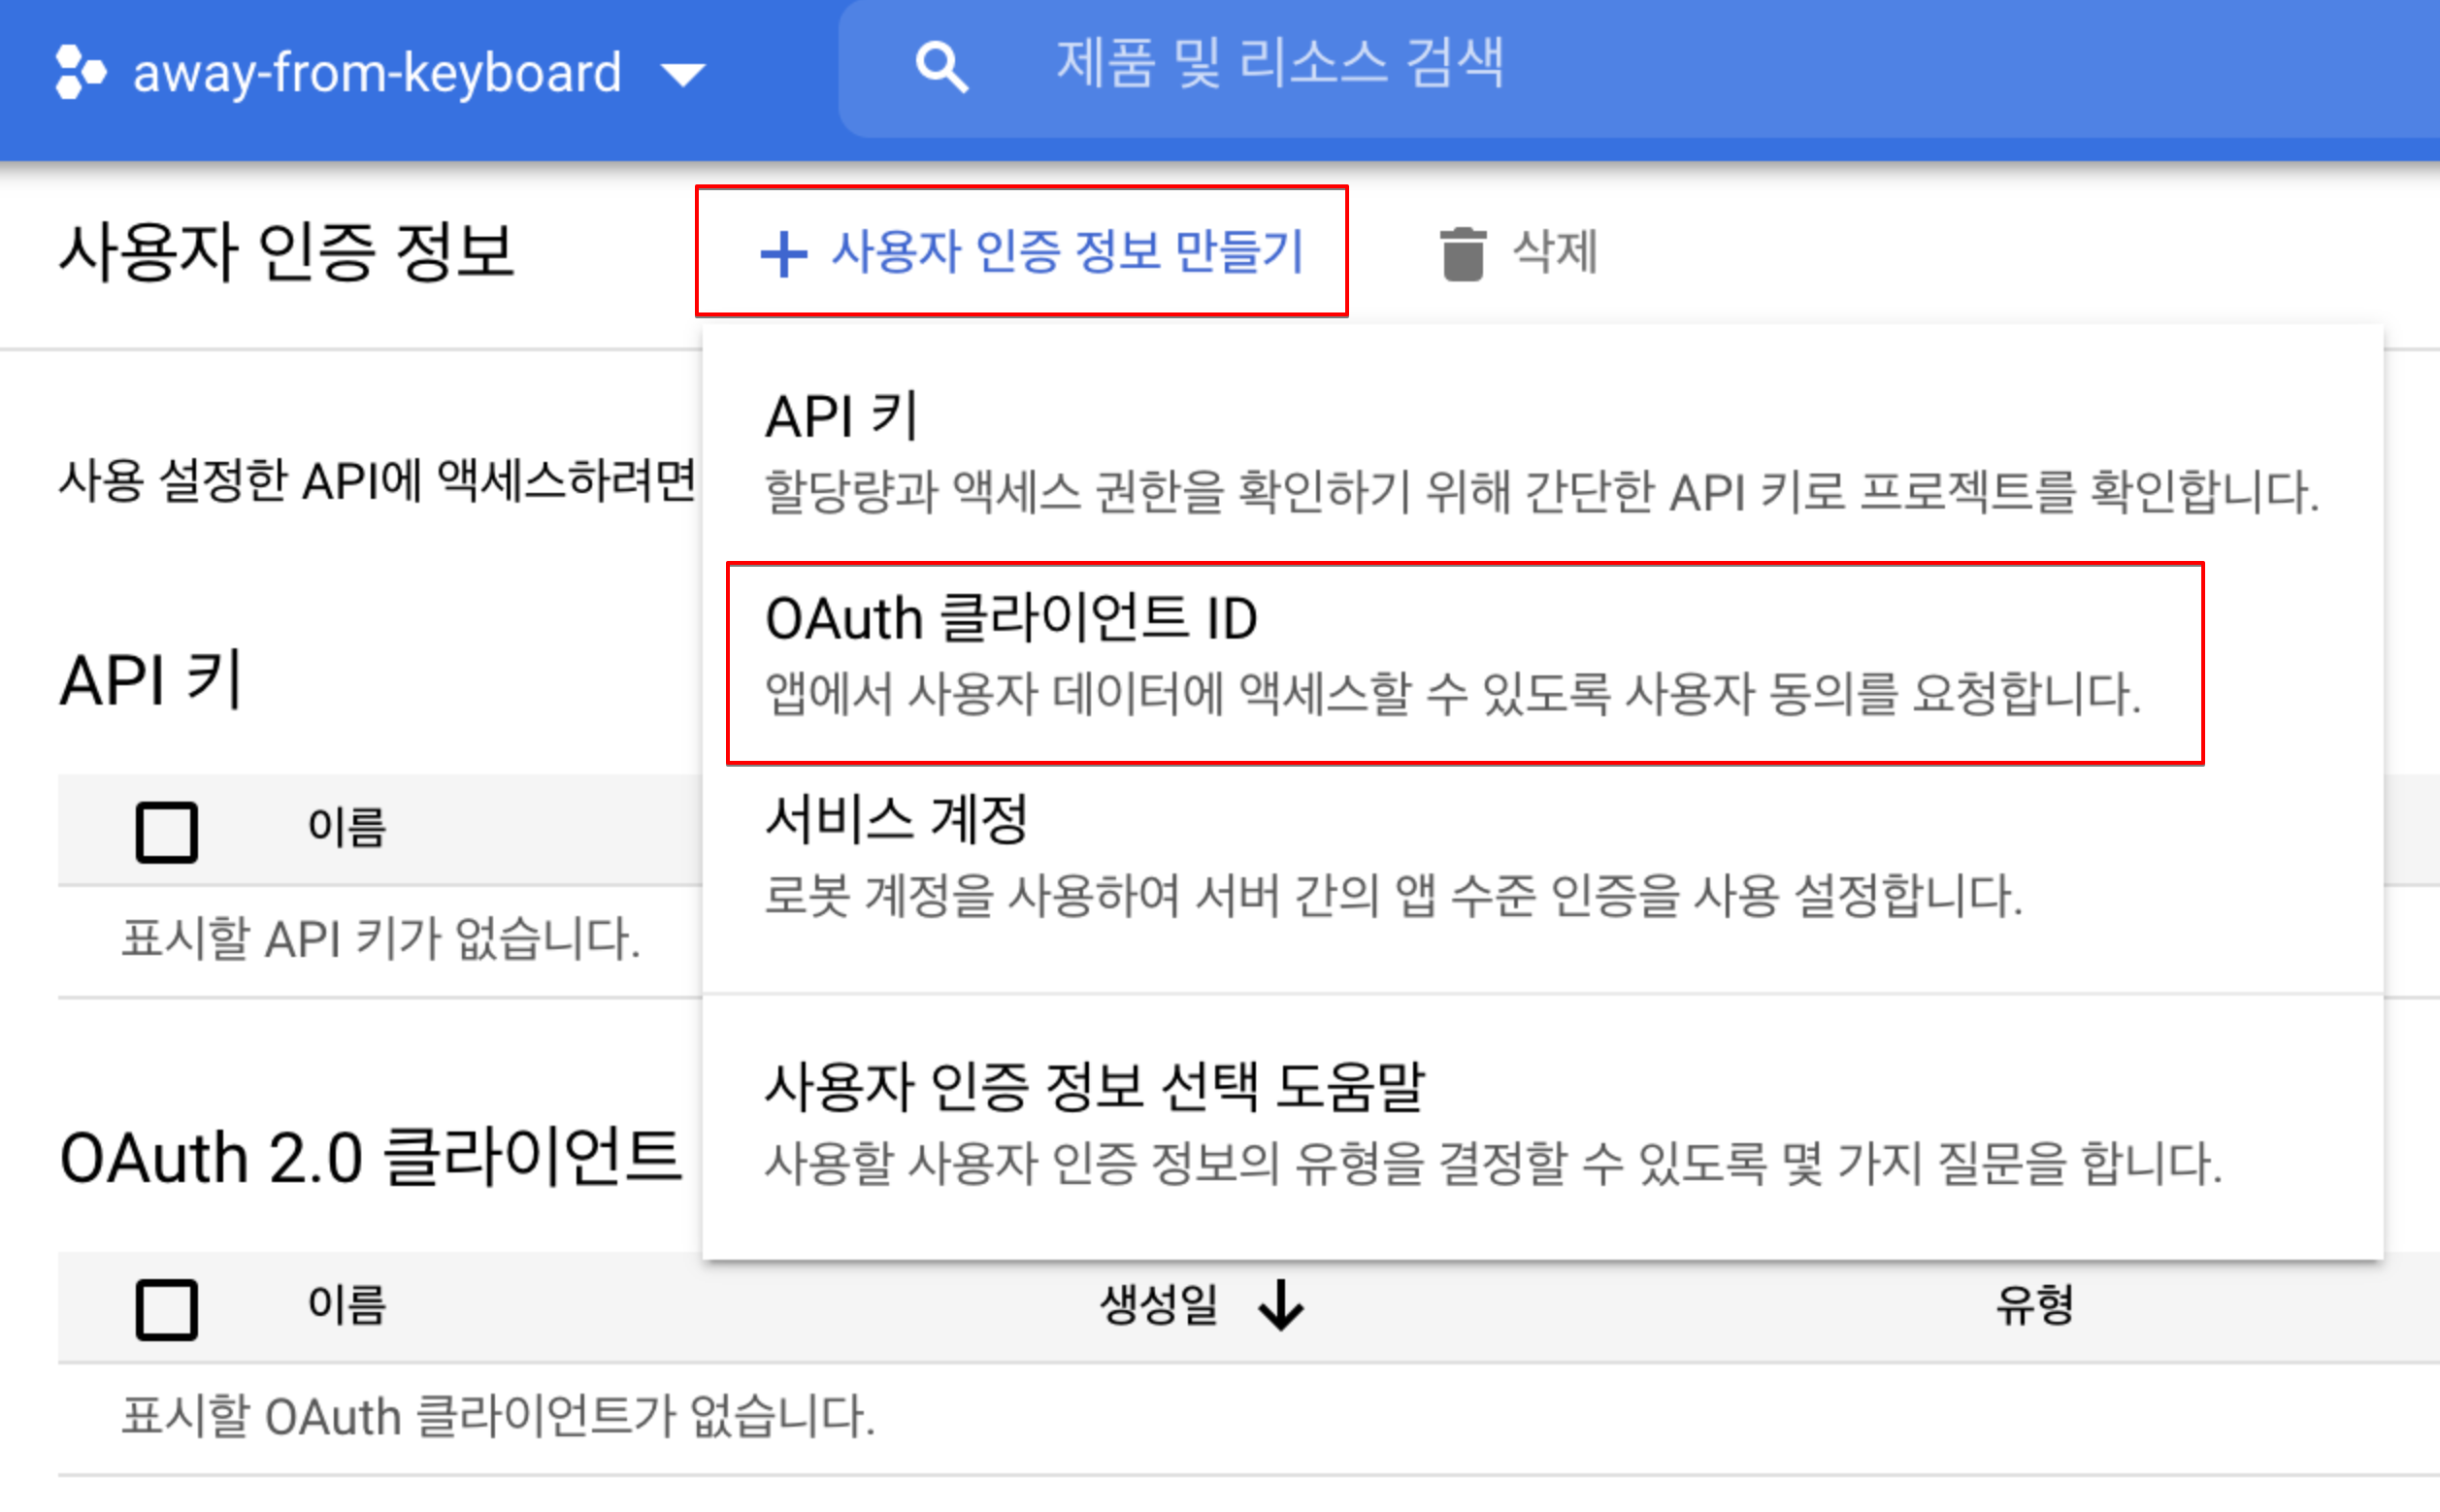
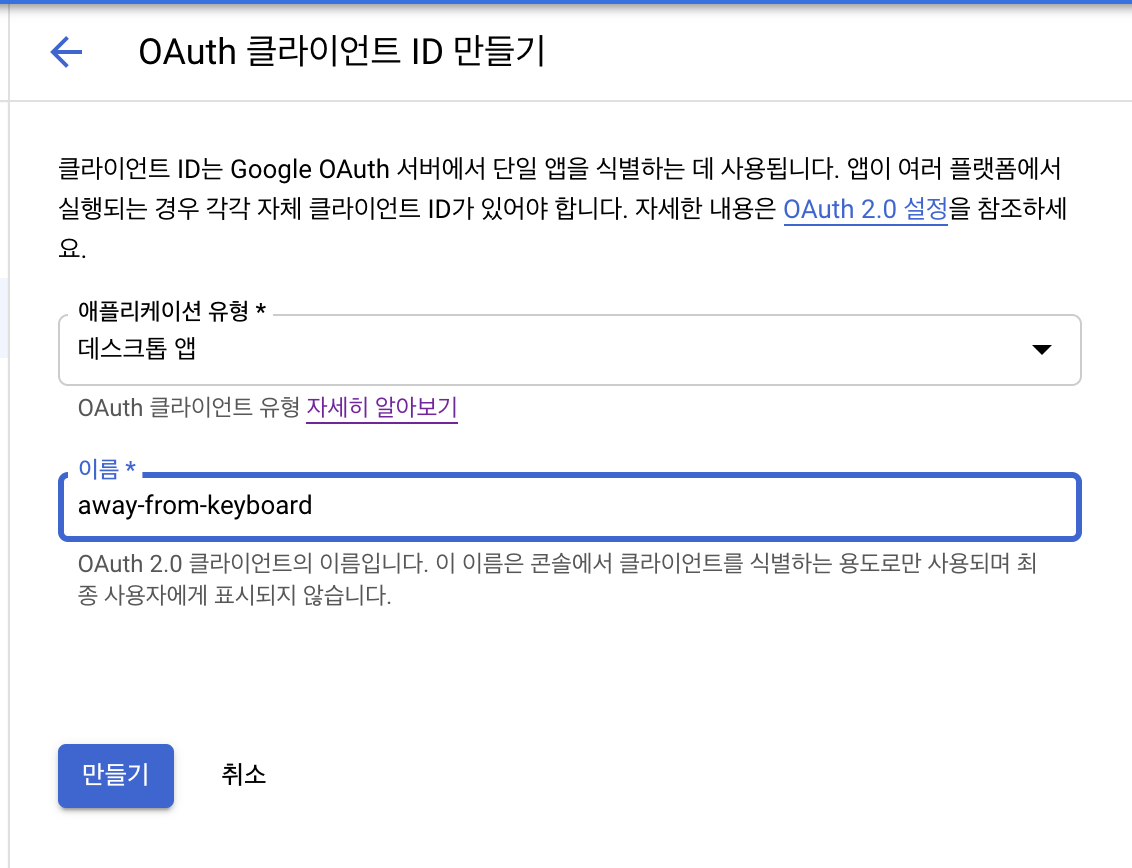
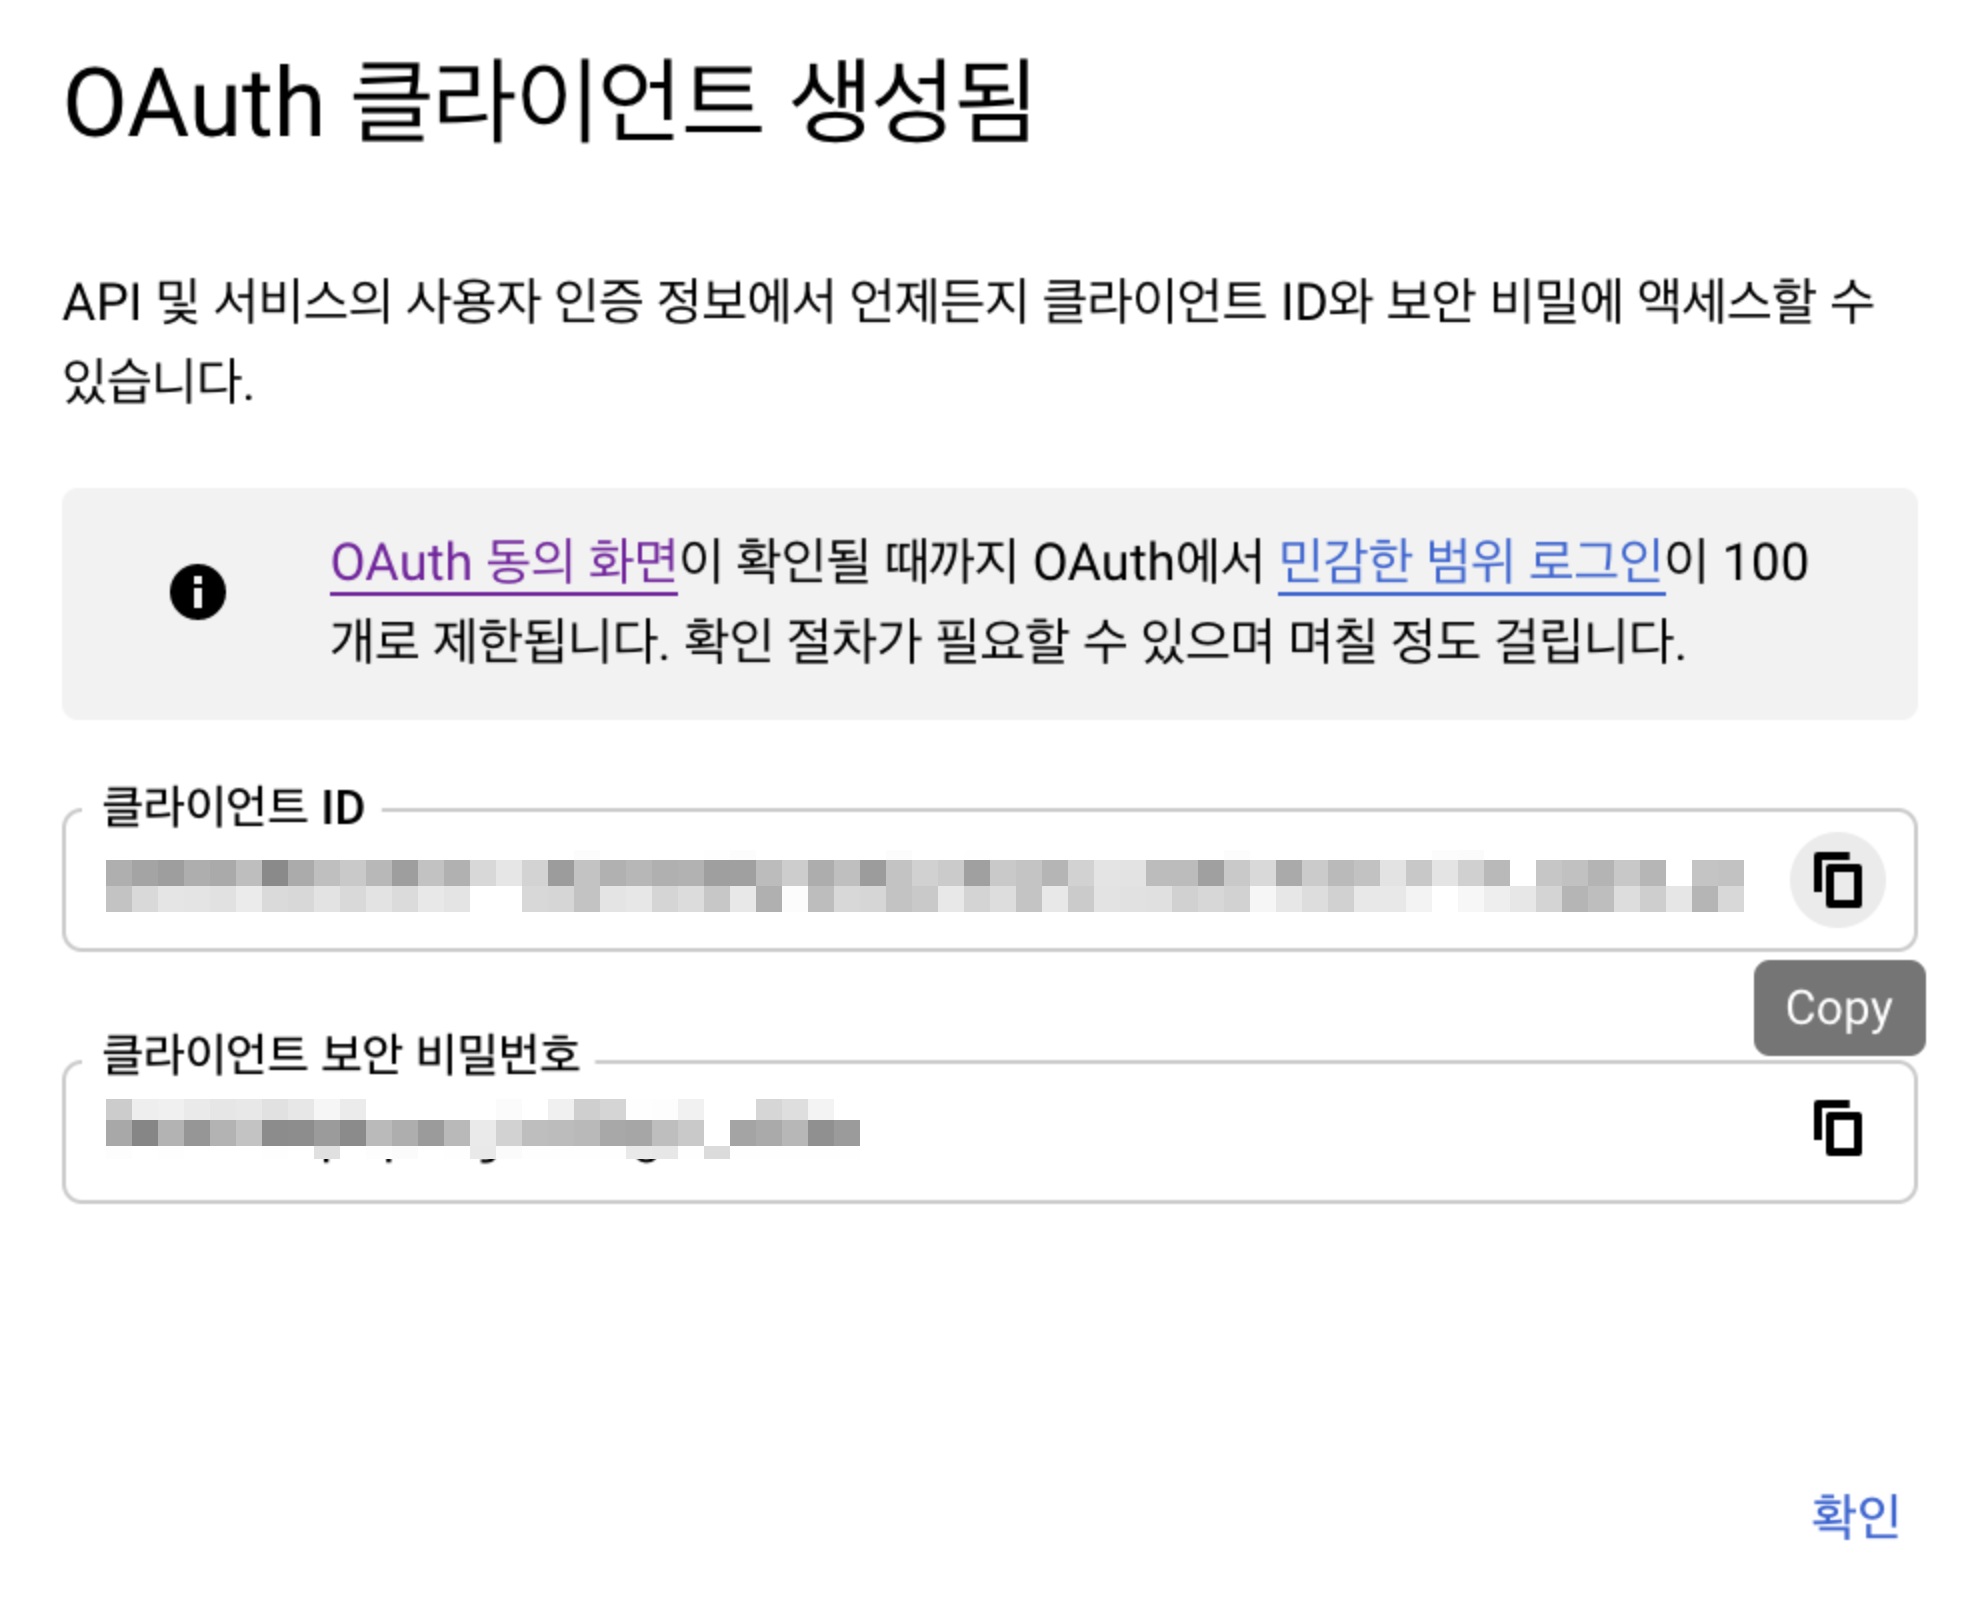
Create OAuth Credentials
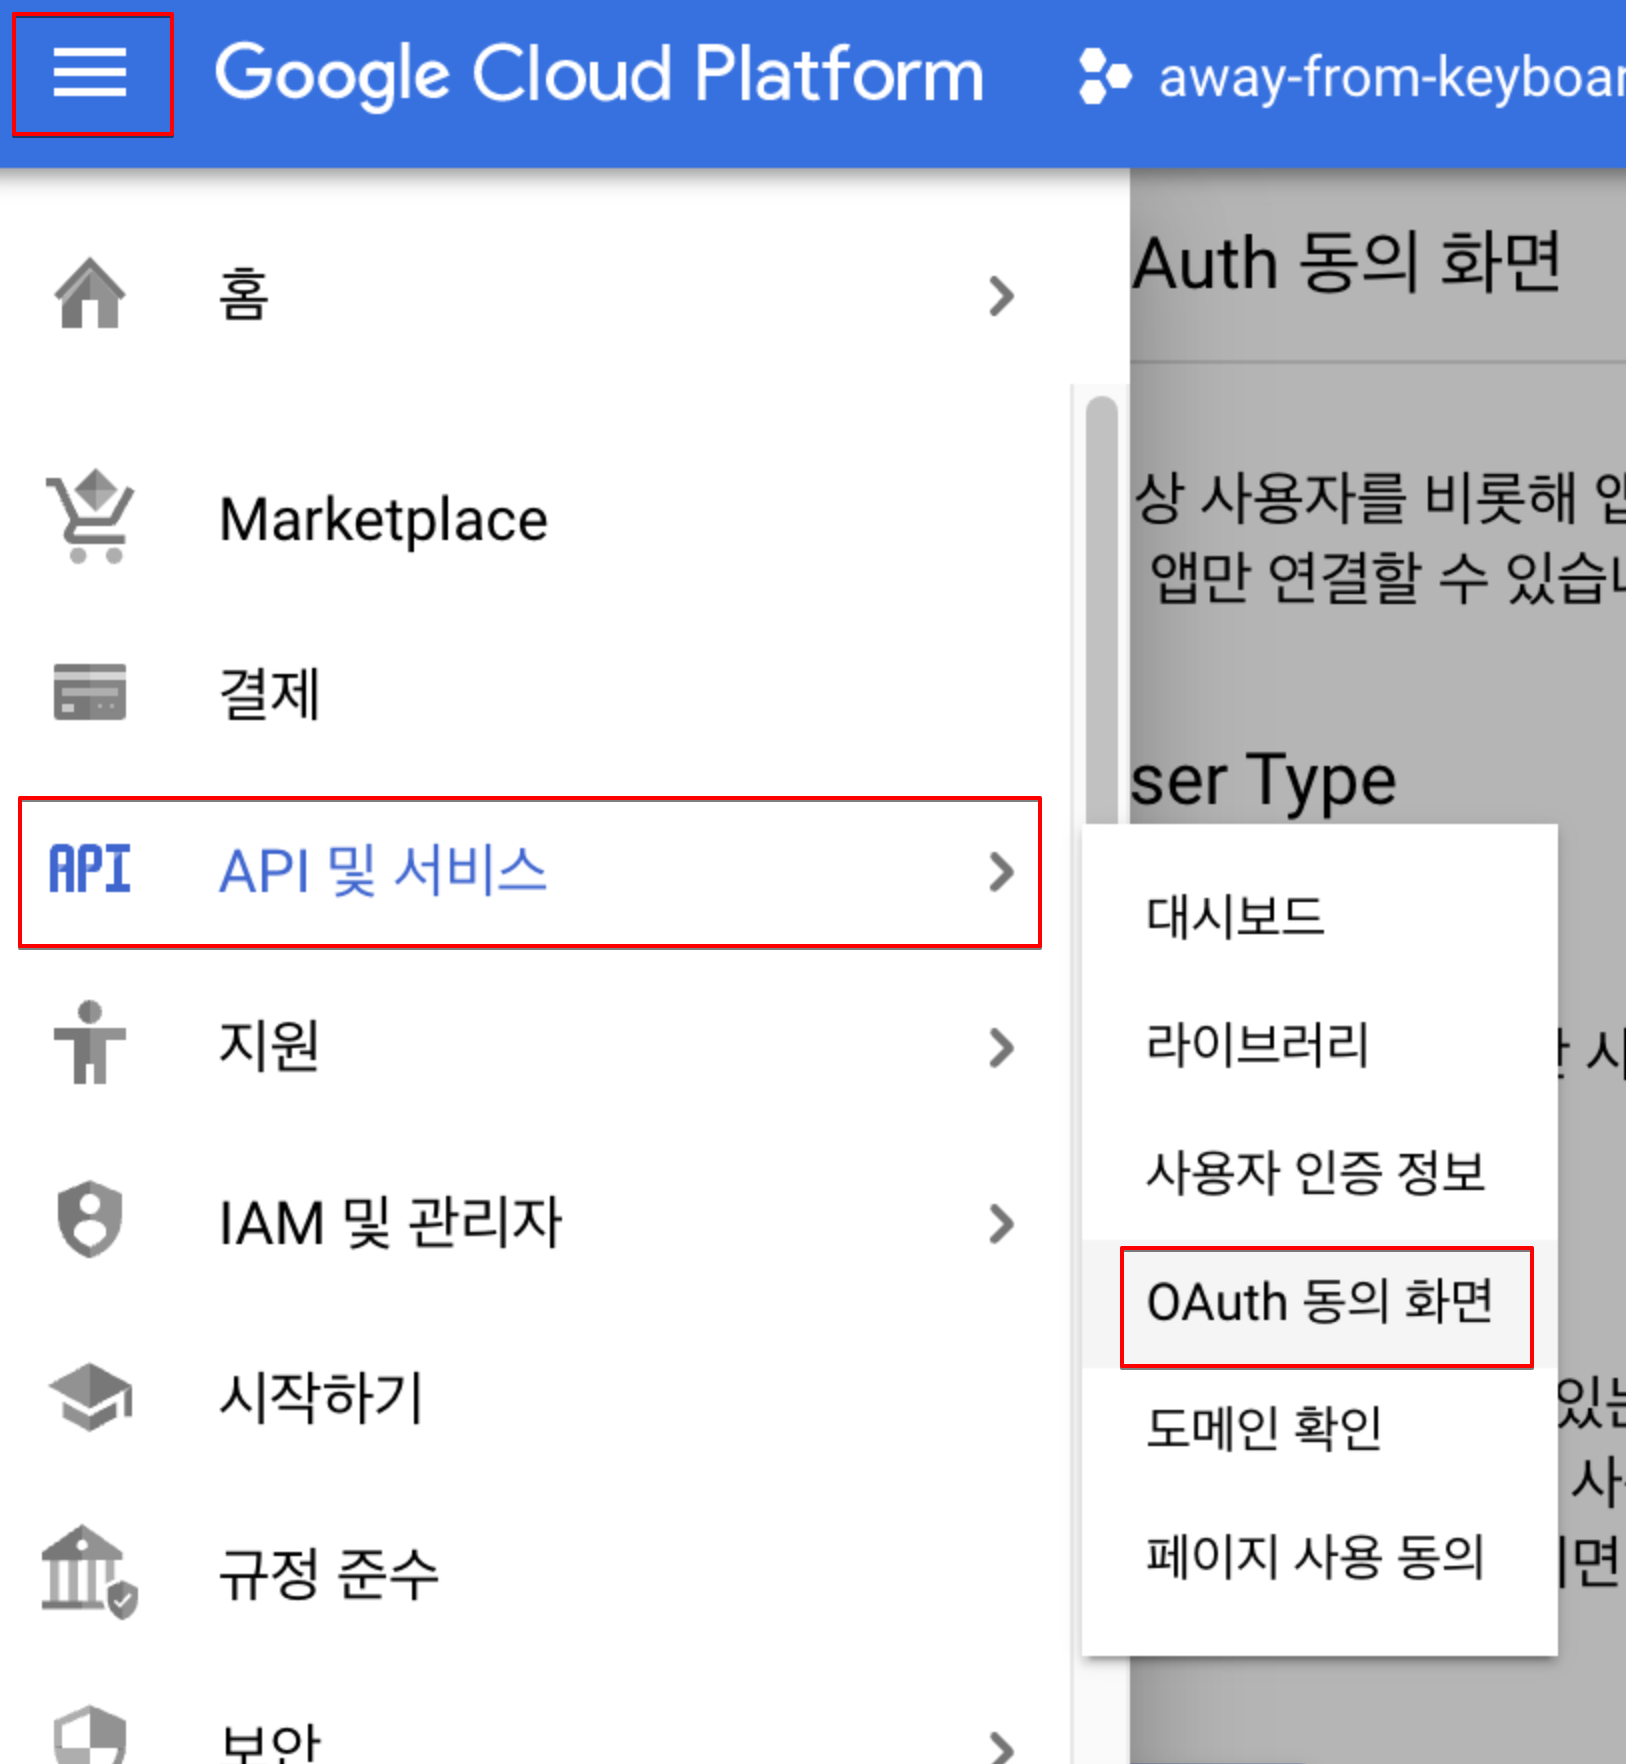
햄버거 > api 및 서비스 > oauth 동의화면
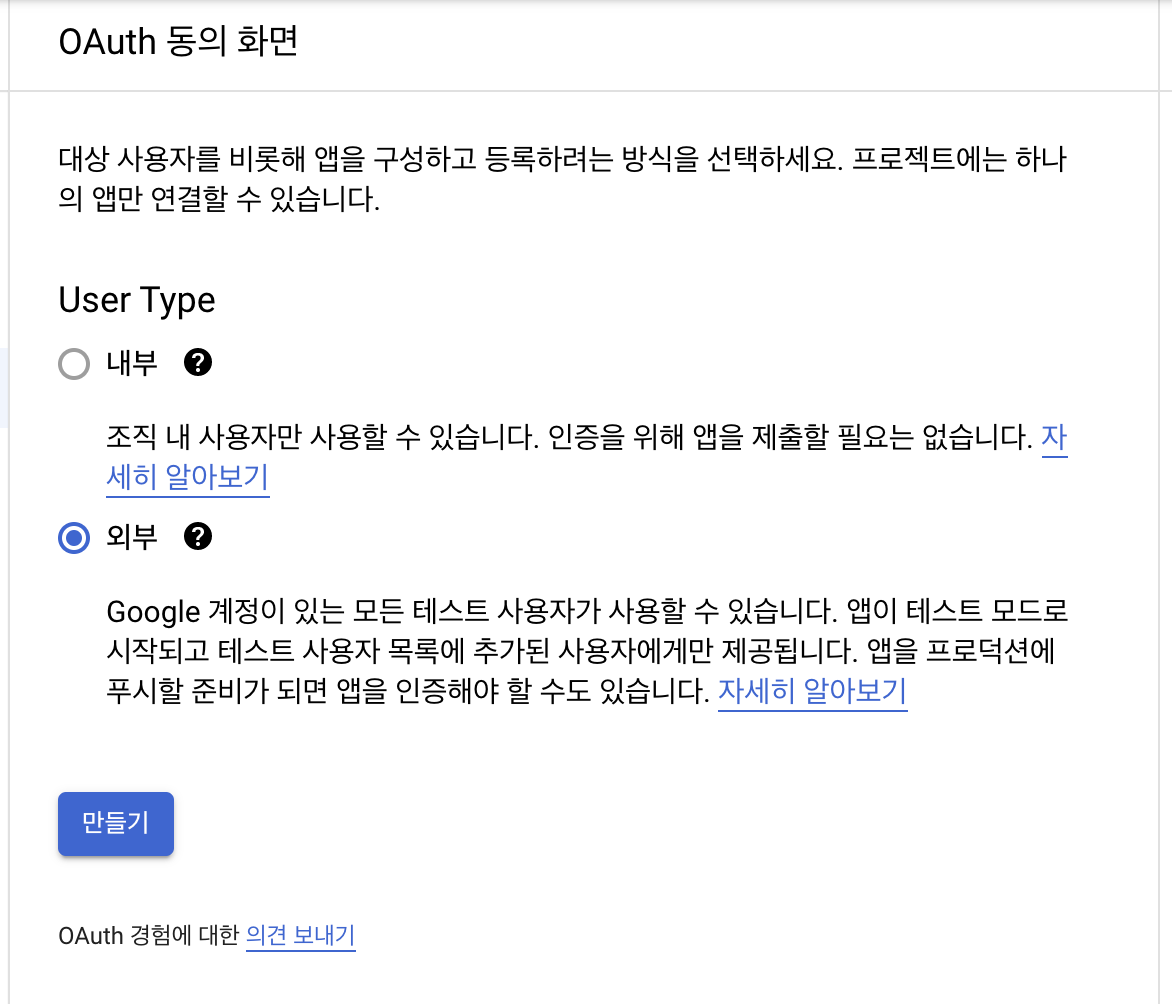
저장.
기본값으로 저장
기본값으로 저장
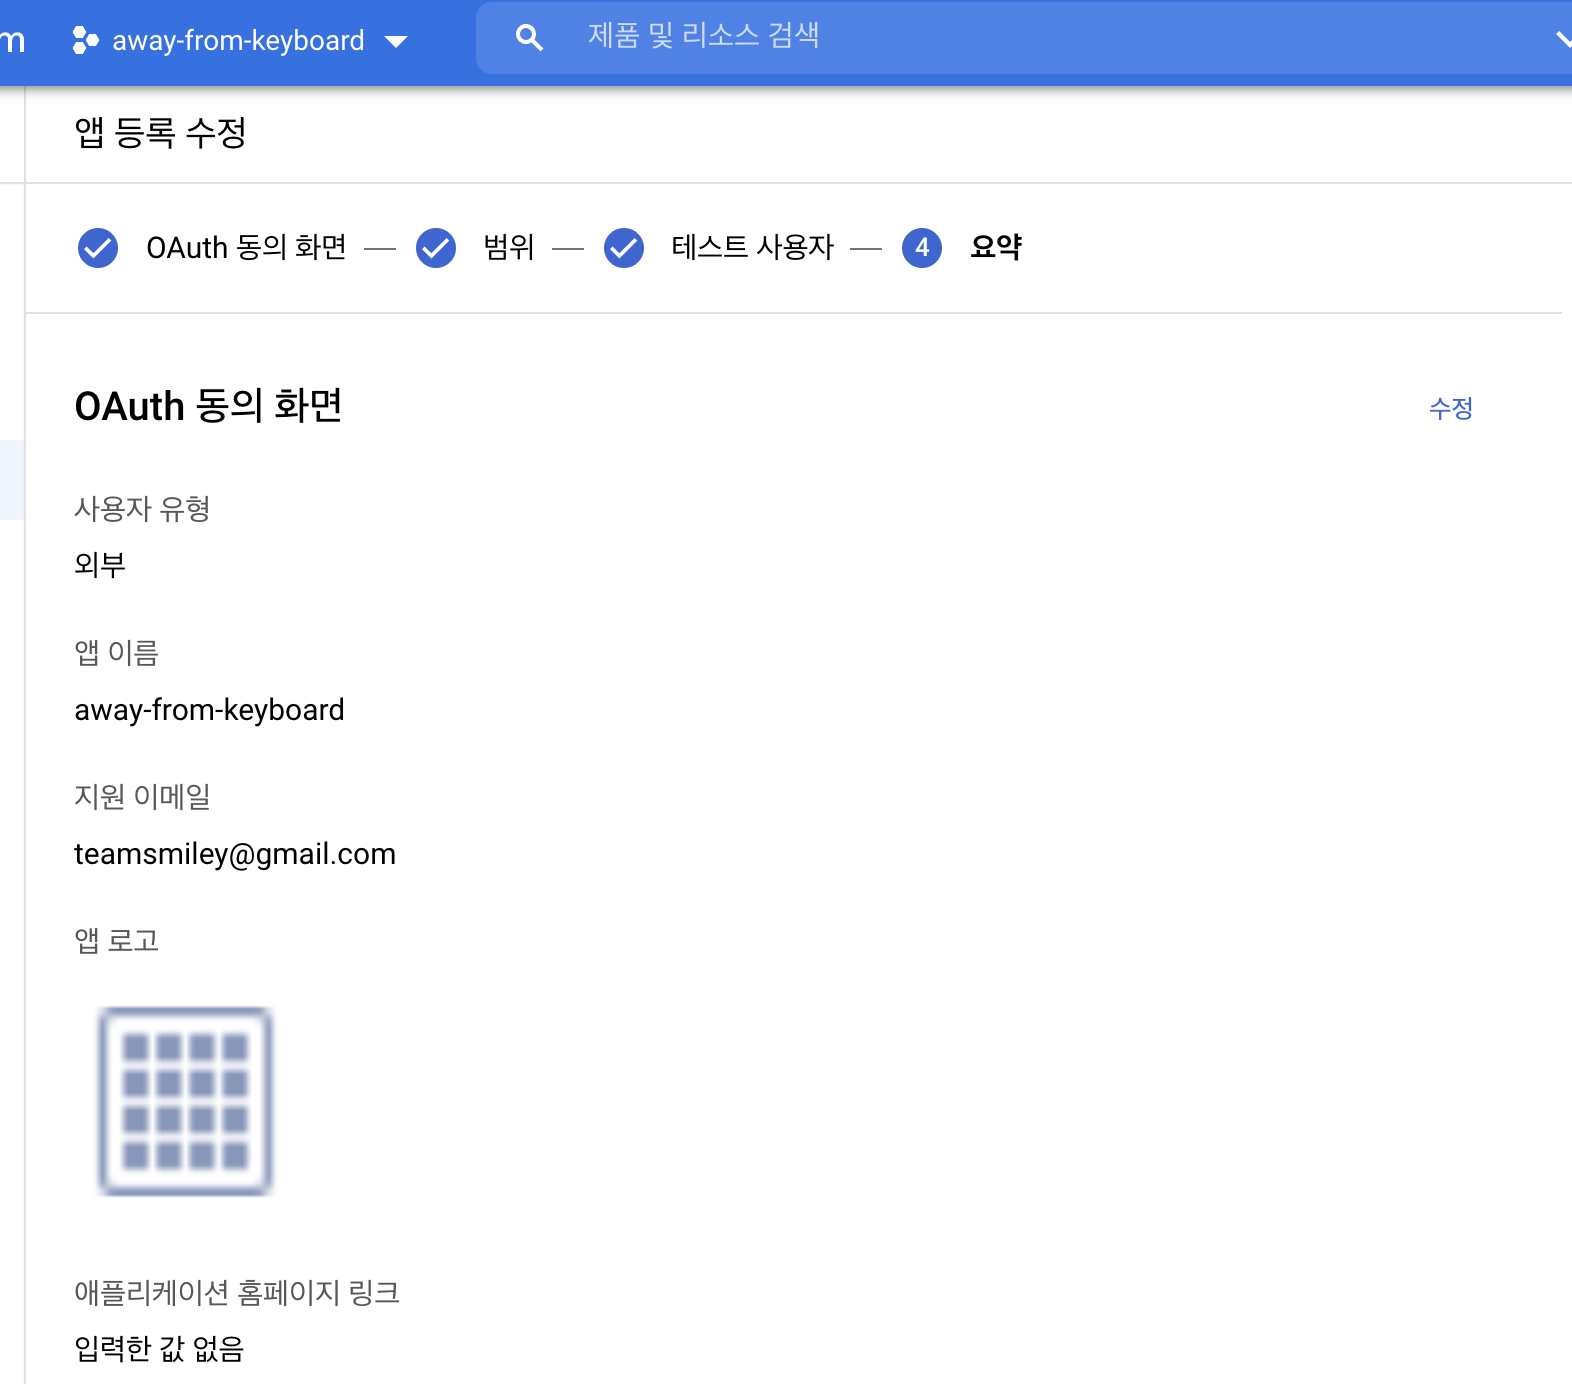
기본값으로 저장
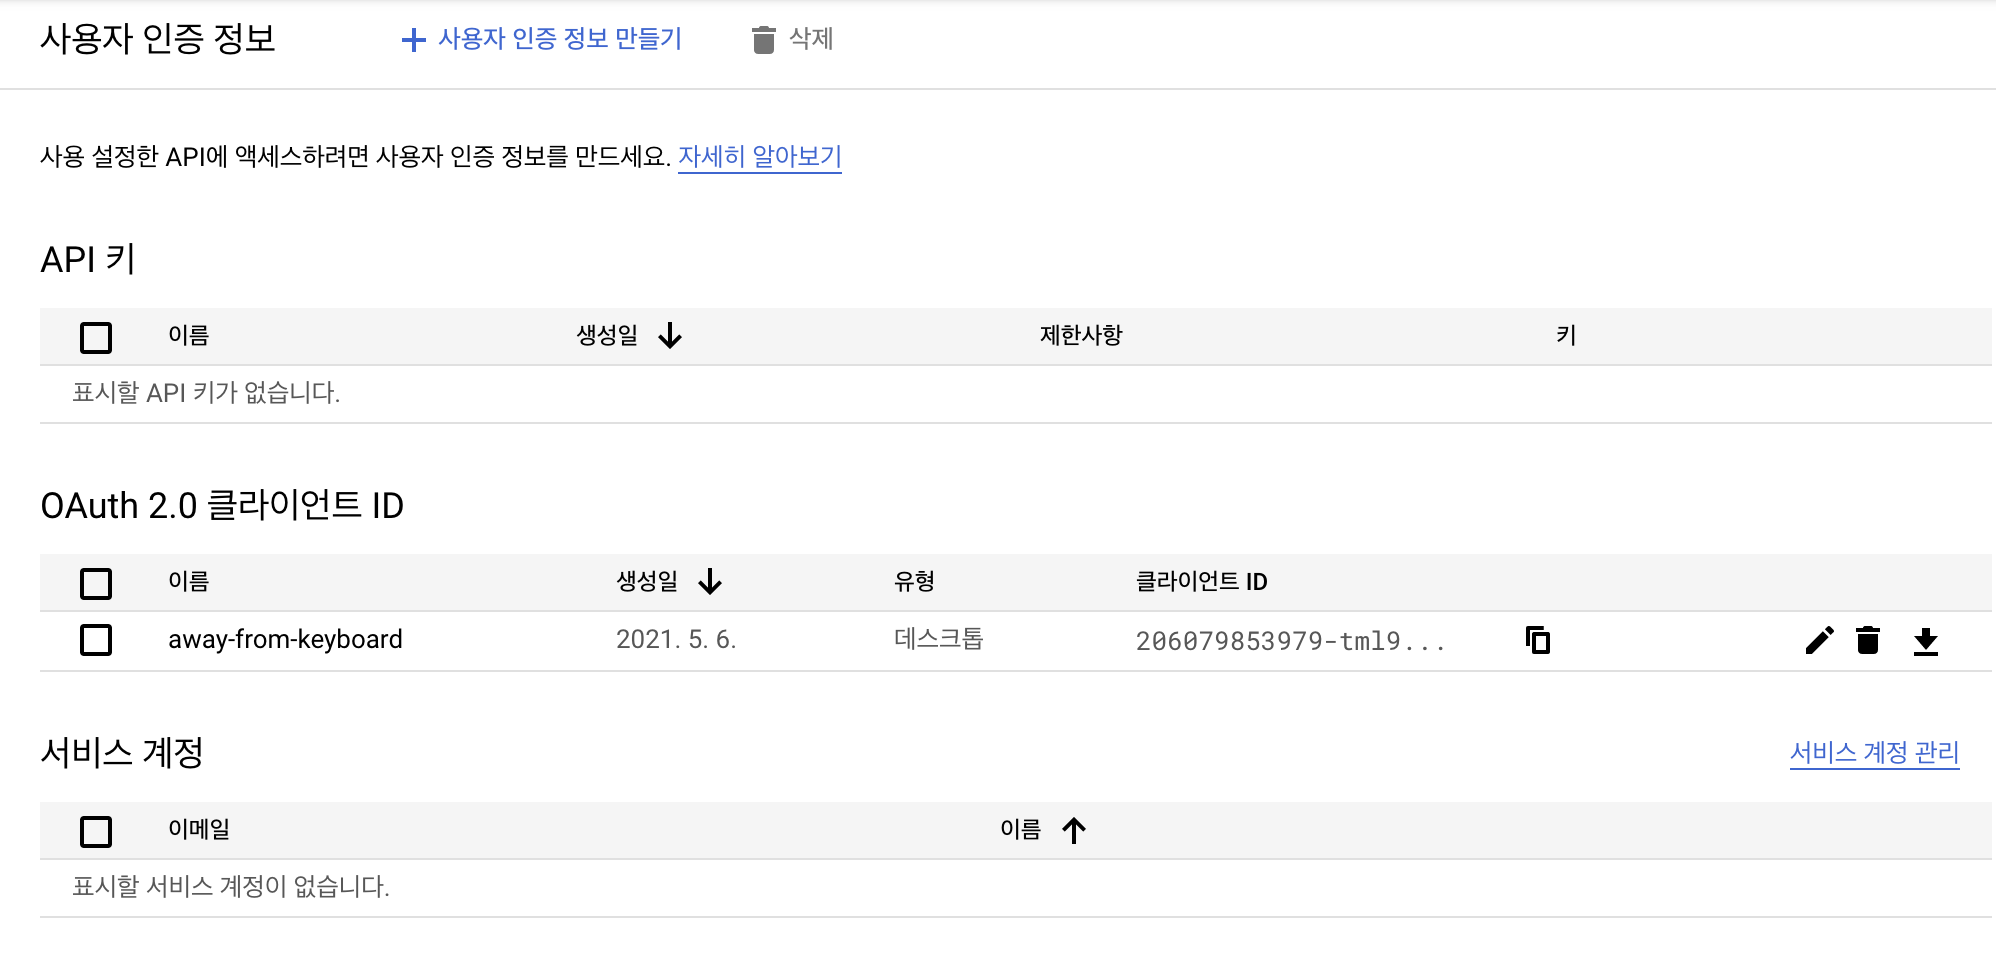
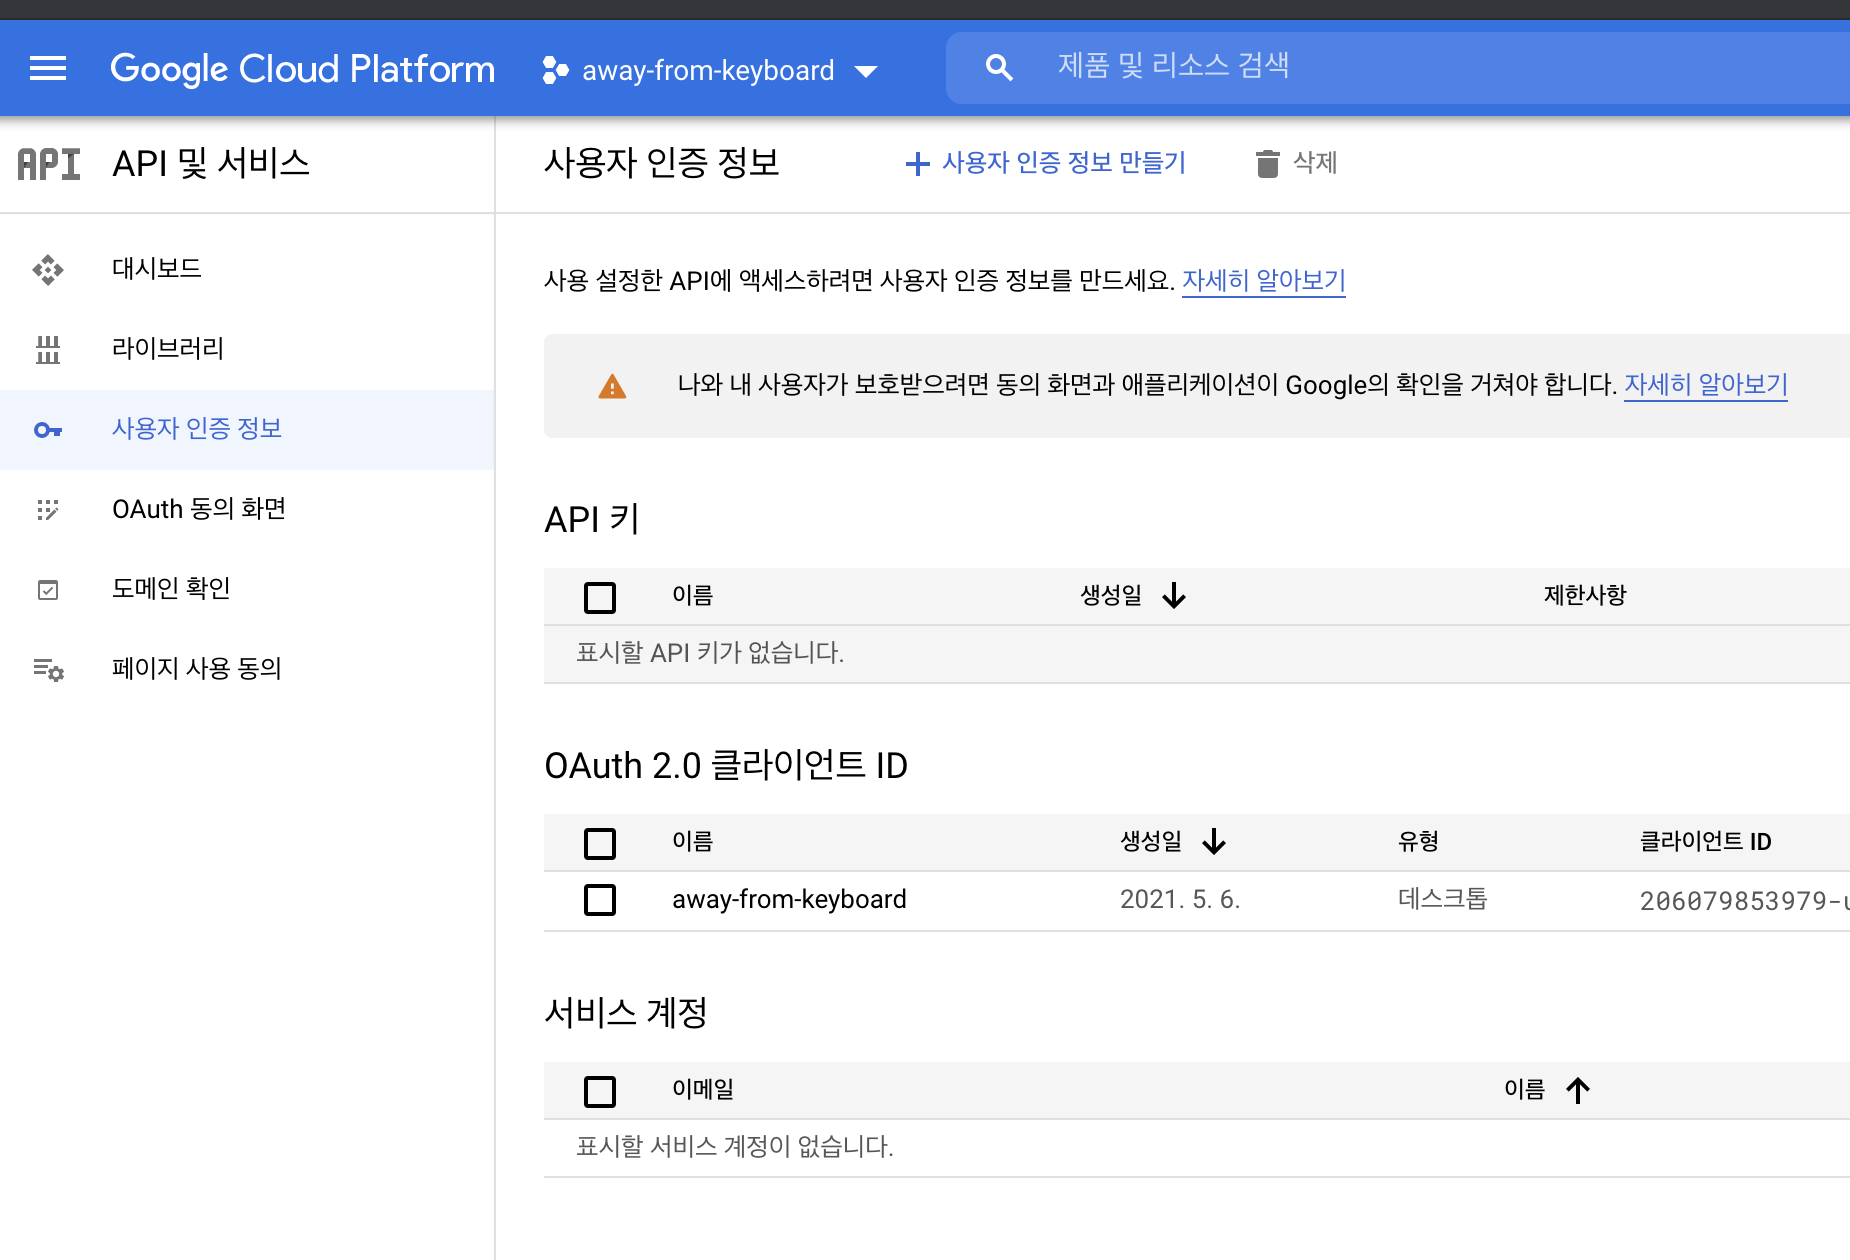
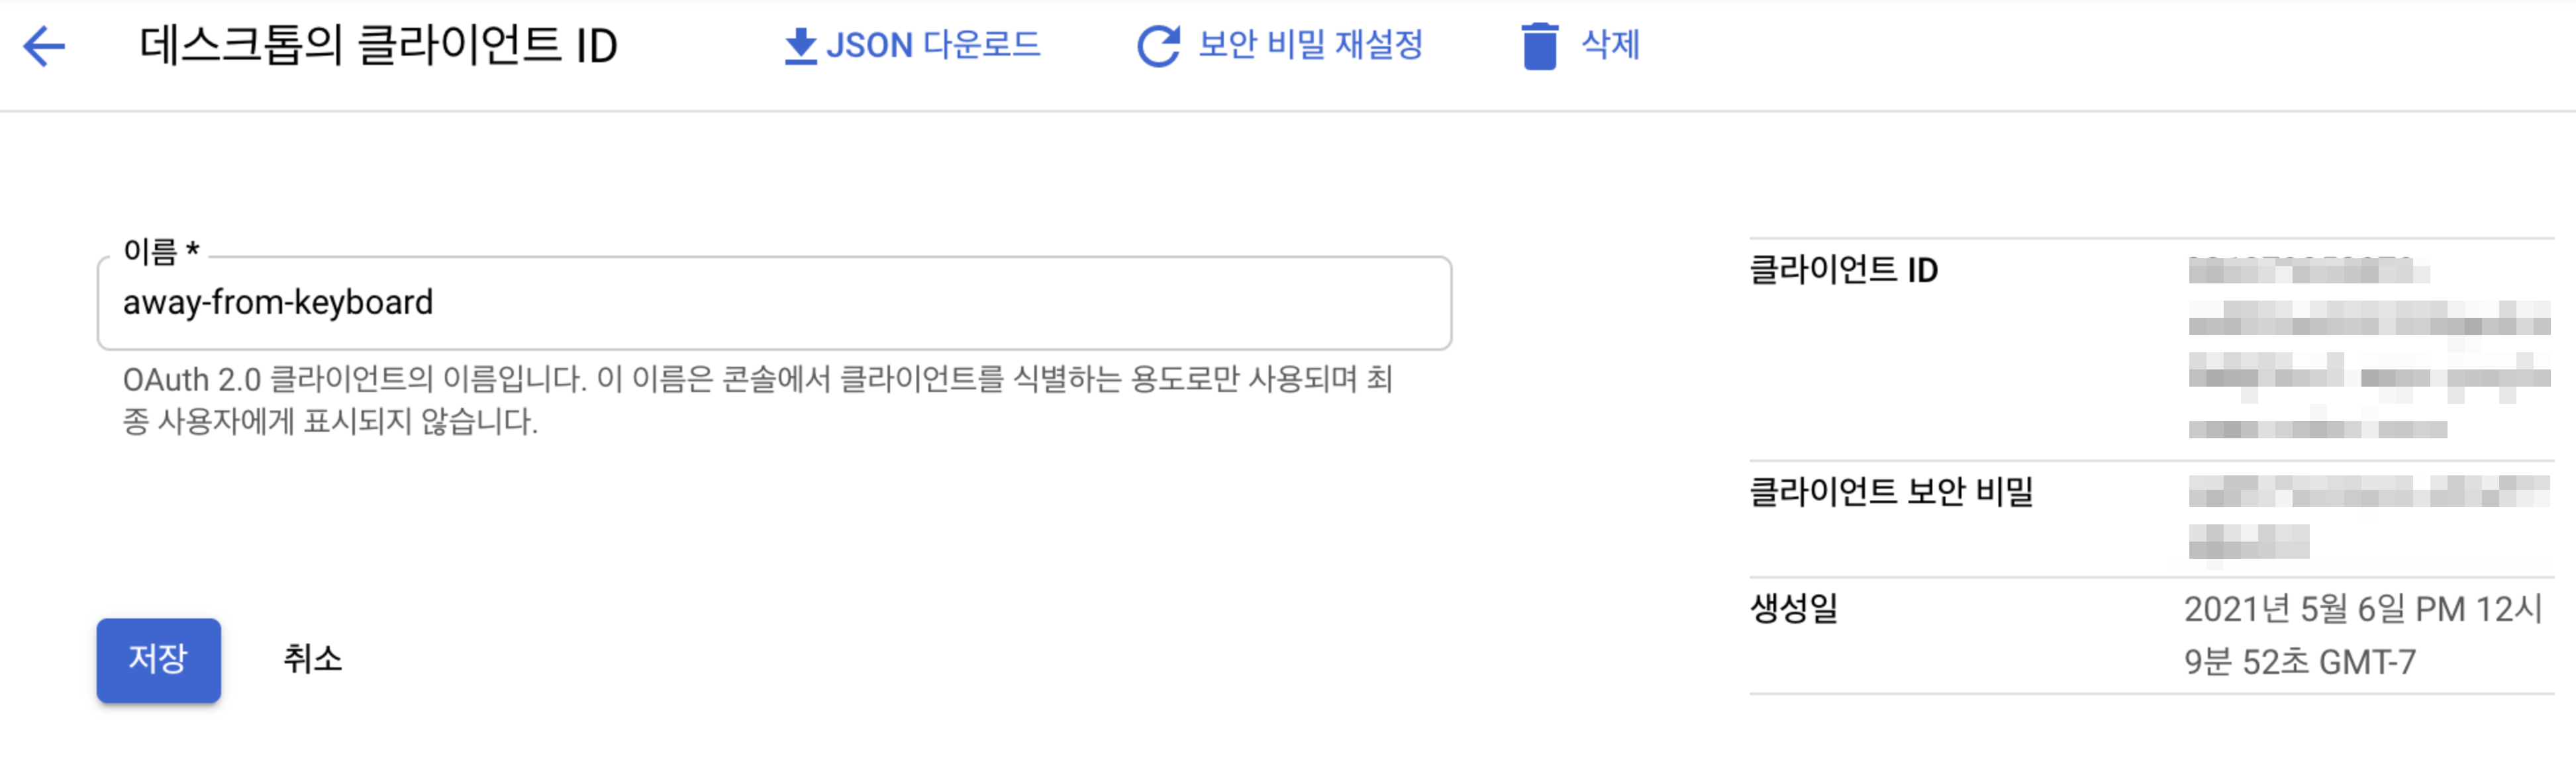
사용자 인증 정보
Refresh Token
https://accounts.google.com/o/oauth2/auth?response_type=code&scope=https://www.googleapis.com/auth/chromewebstore&client_id=$CLIENT_ID&redirect_uri=urn:ietf:wg:oauth:2.0:oob
clientid만 수정해서 요청해보자. 구글 아이디로 로그인 되 있어야한다.
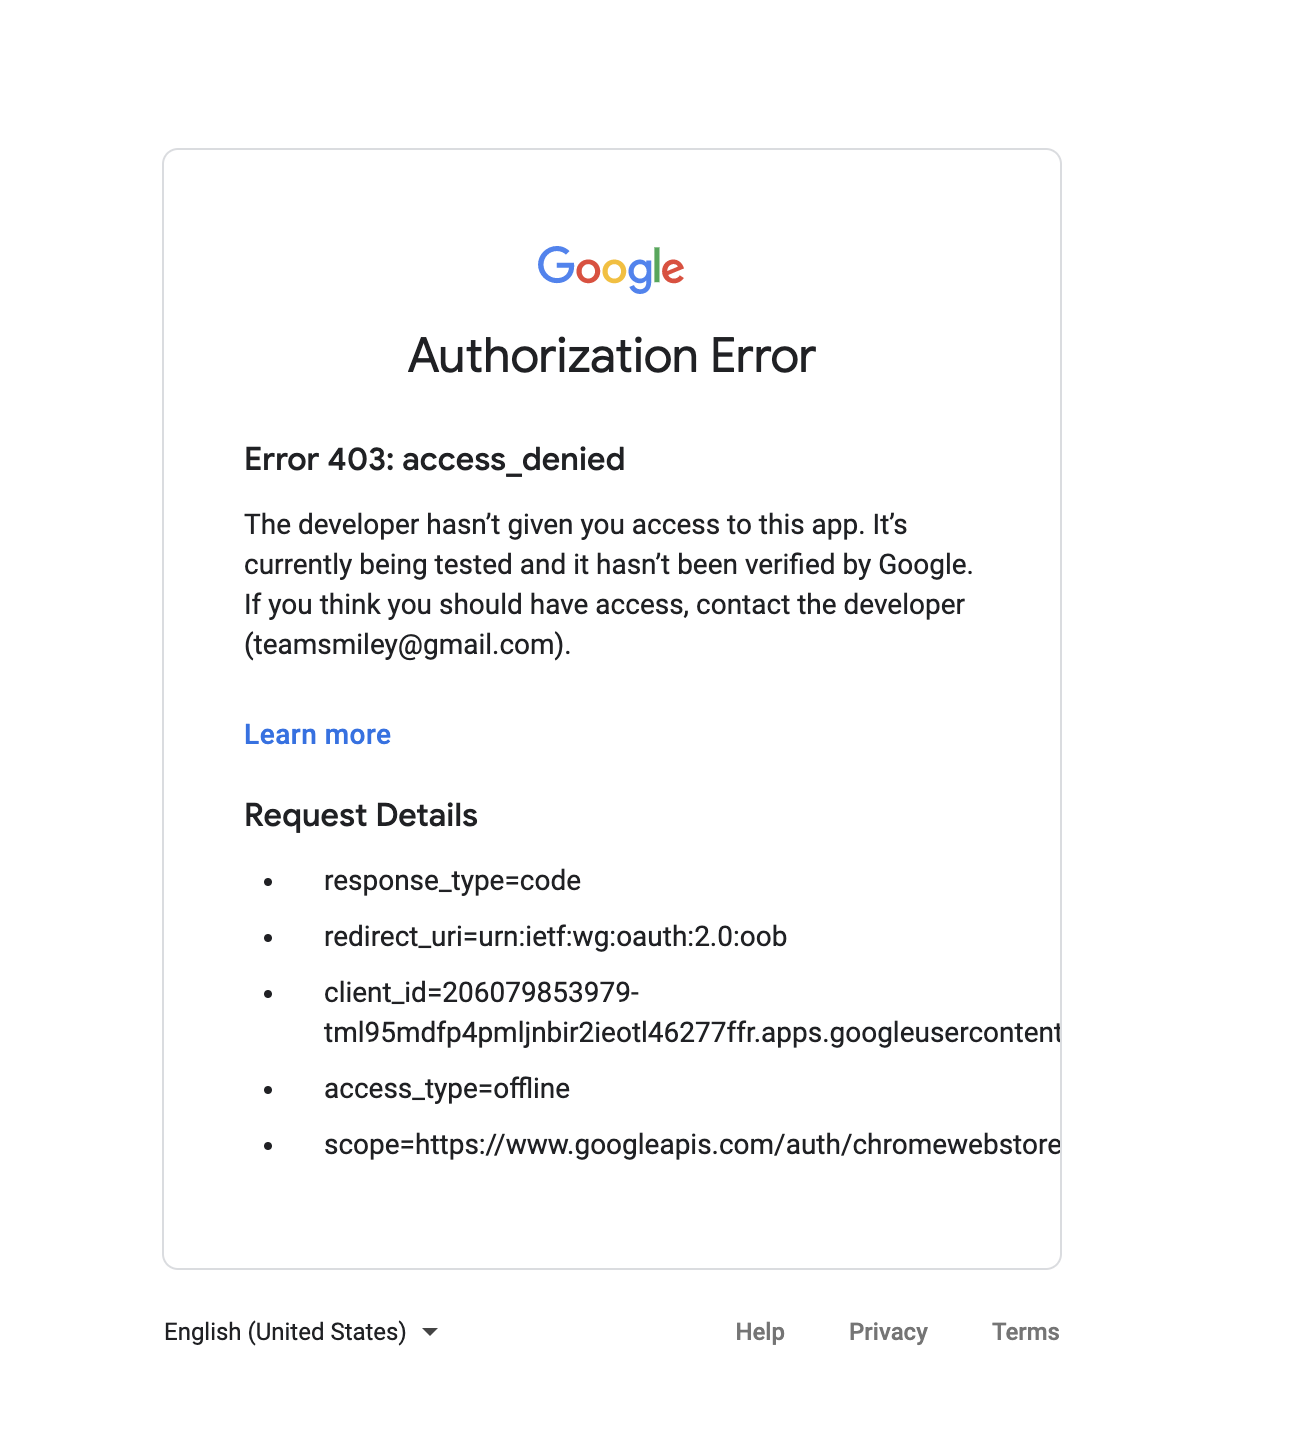
음 크롬 익스텐션이 게시가 되야 처리가 가능한가 보다.
앱을 게시를 해야한다.
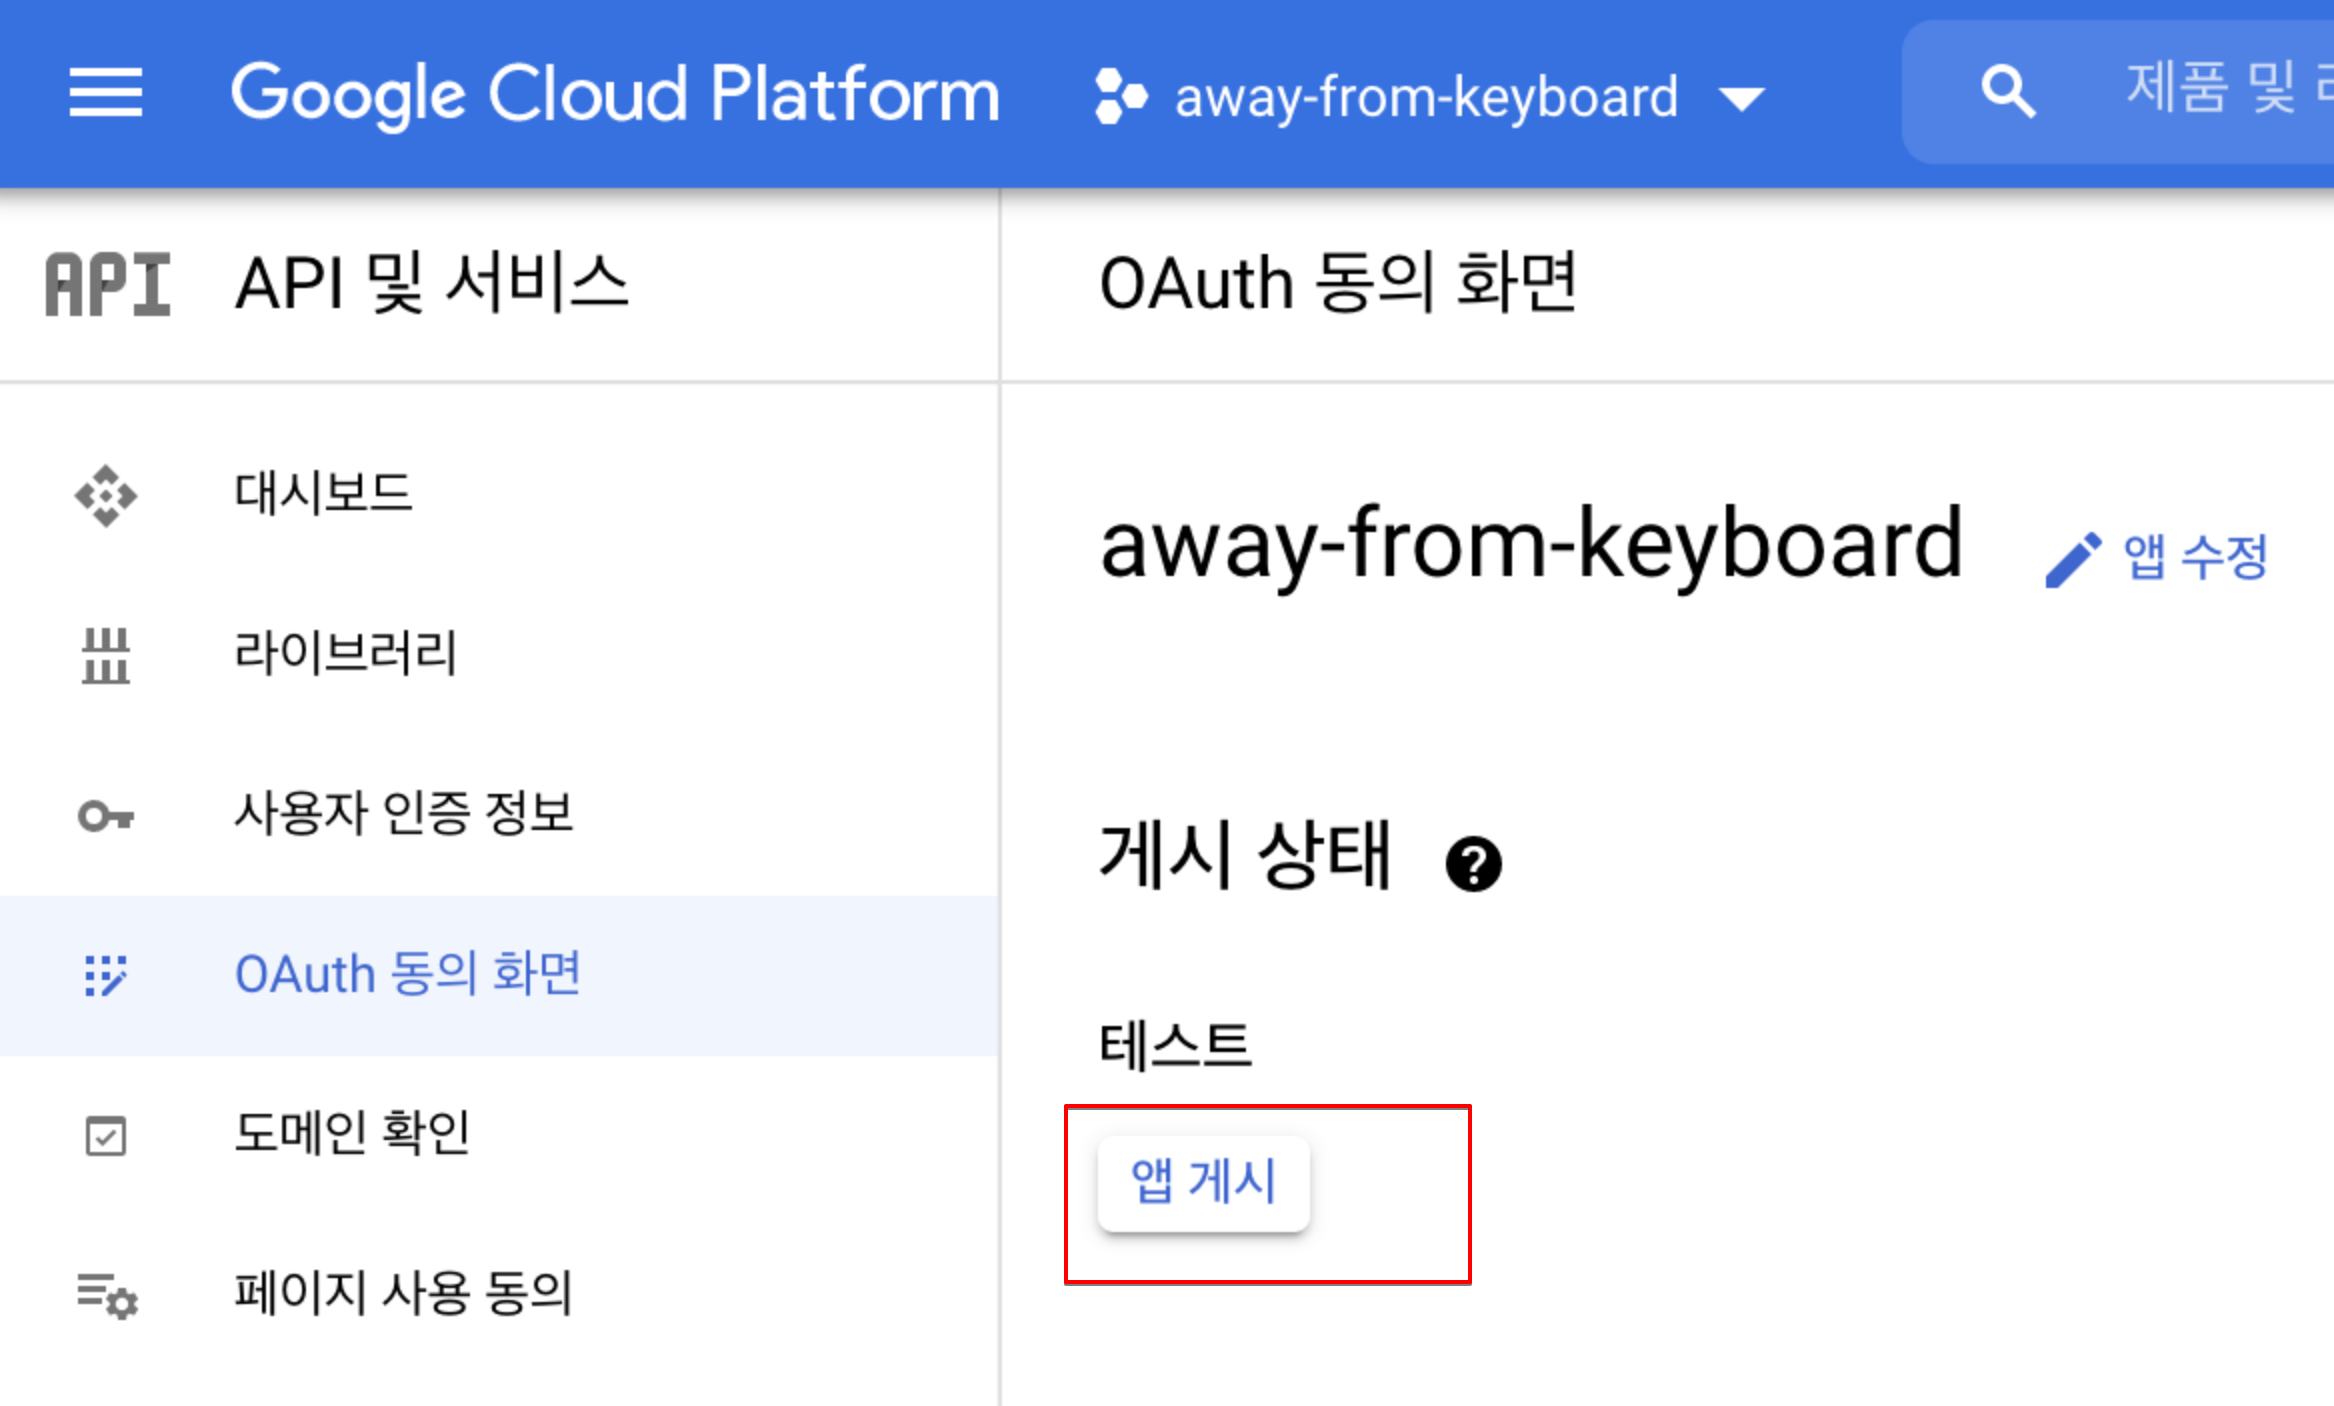
앱게시를 클릭한다.
링크를 다시 해보자.
https://accounts.google.com/o/oauth2/auth?response_type=code&scope=https://www.googleapis.com/auth/chromewebstore&client_id=XXXXX-3kl0jftkrn1.apps.googleusercontent.com&redirect_uri=urn:ietf:wg:oauth:2.0:oob
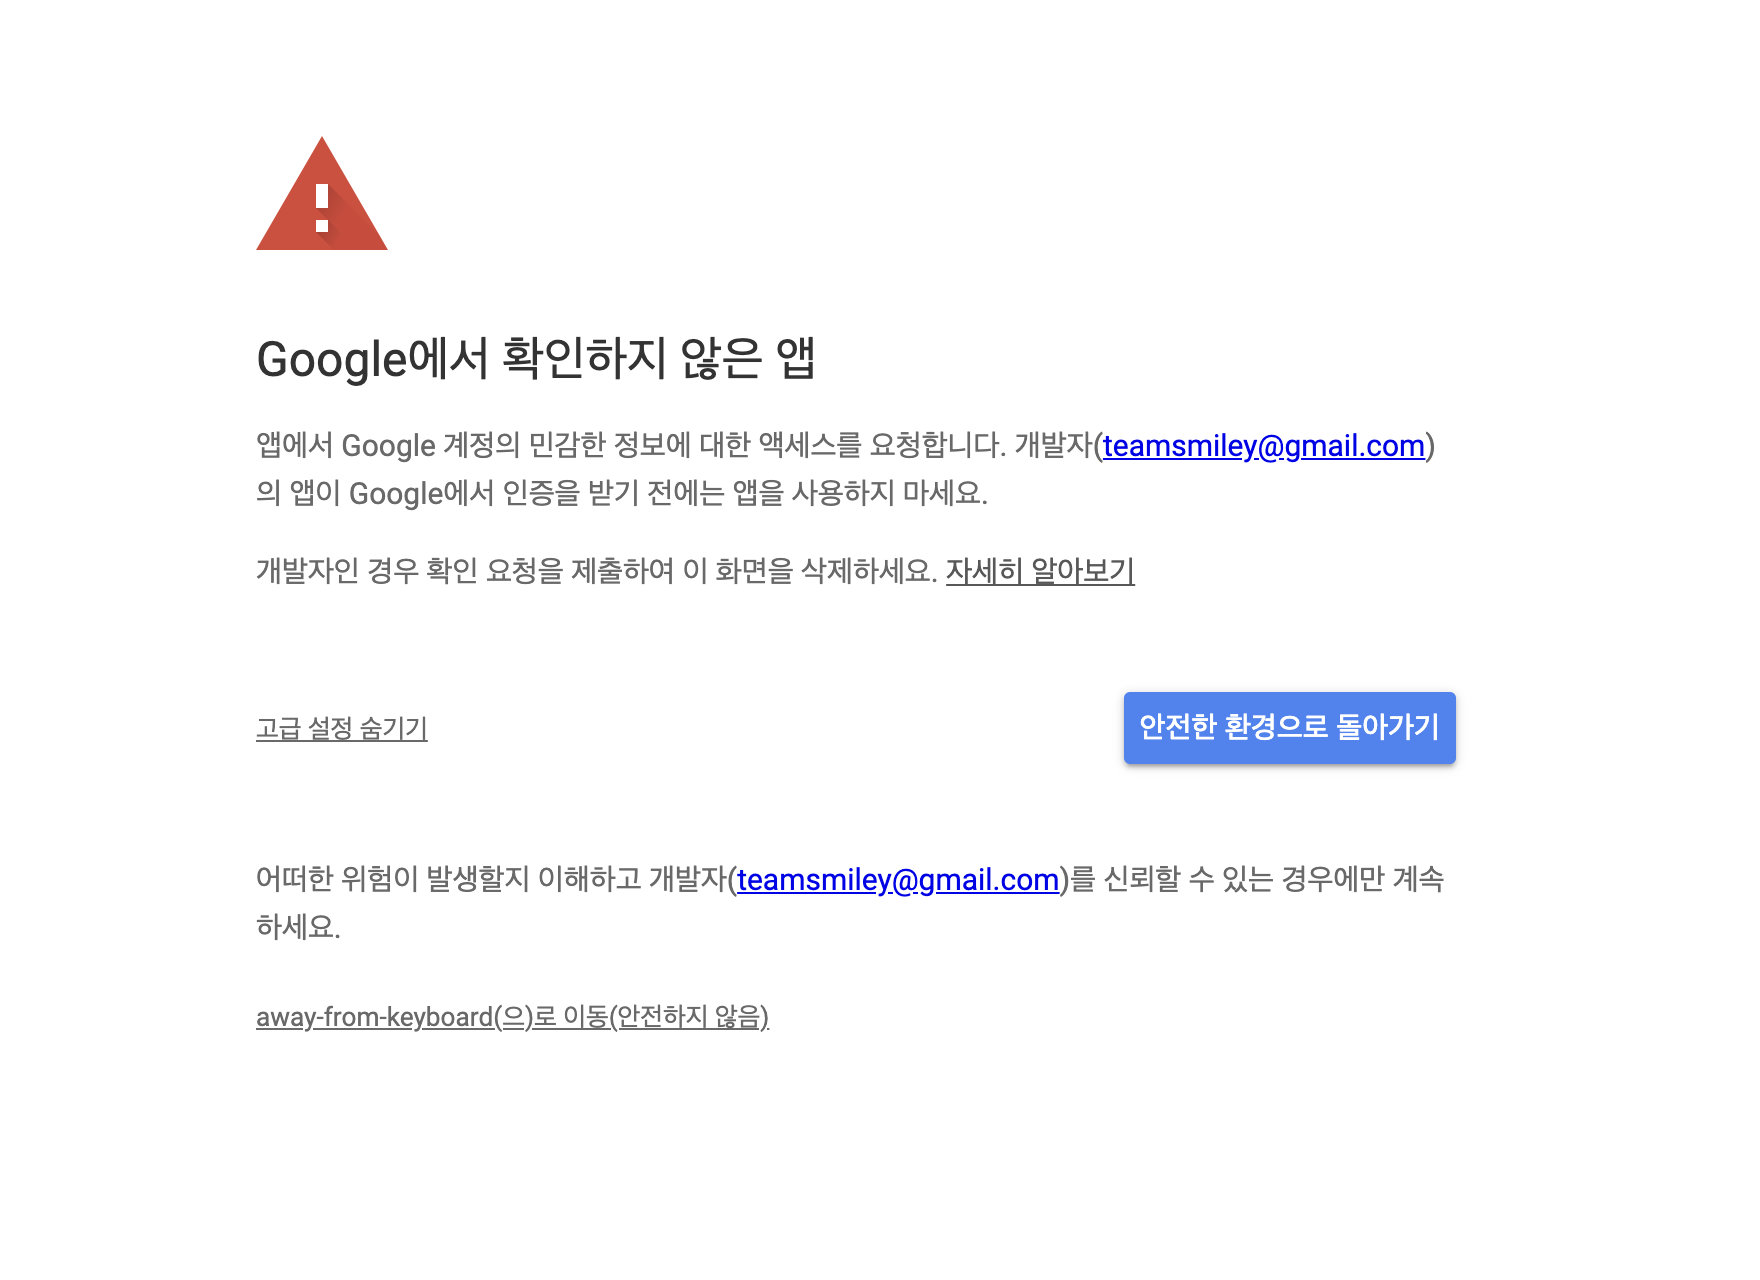
내가 만든 앱이니까 away-from-keyboard로 이동을 클릭한다.
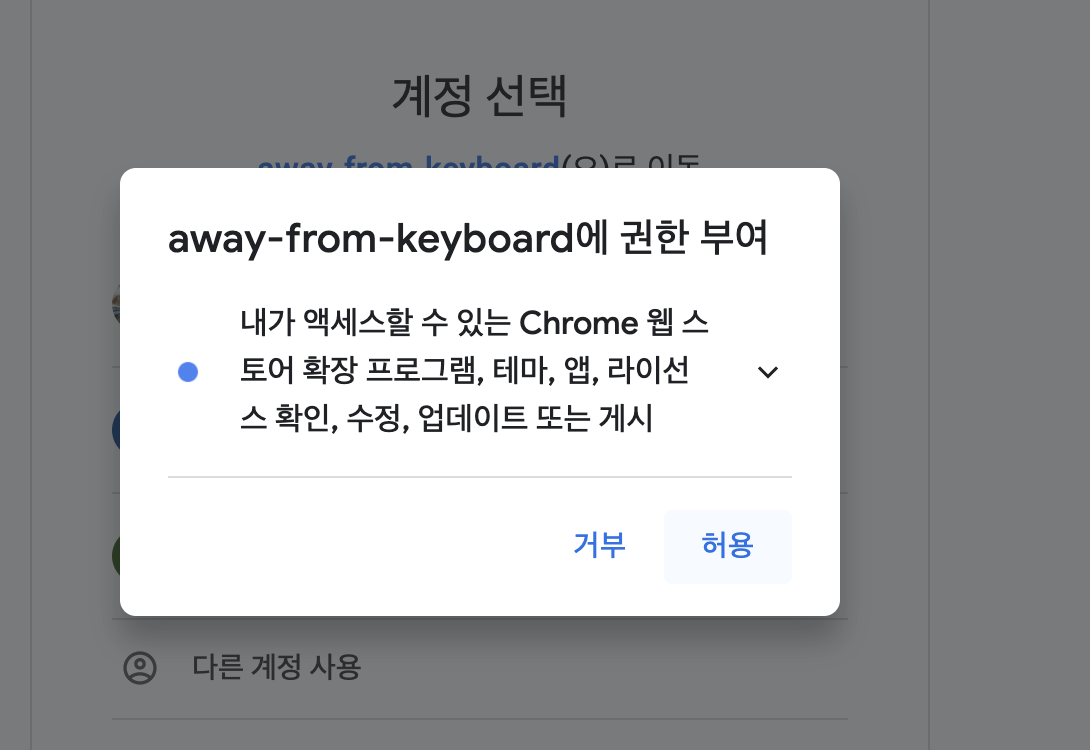
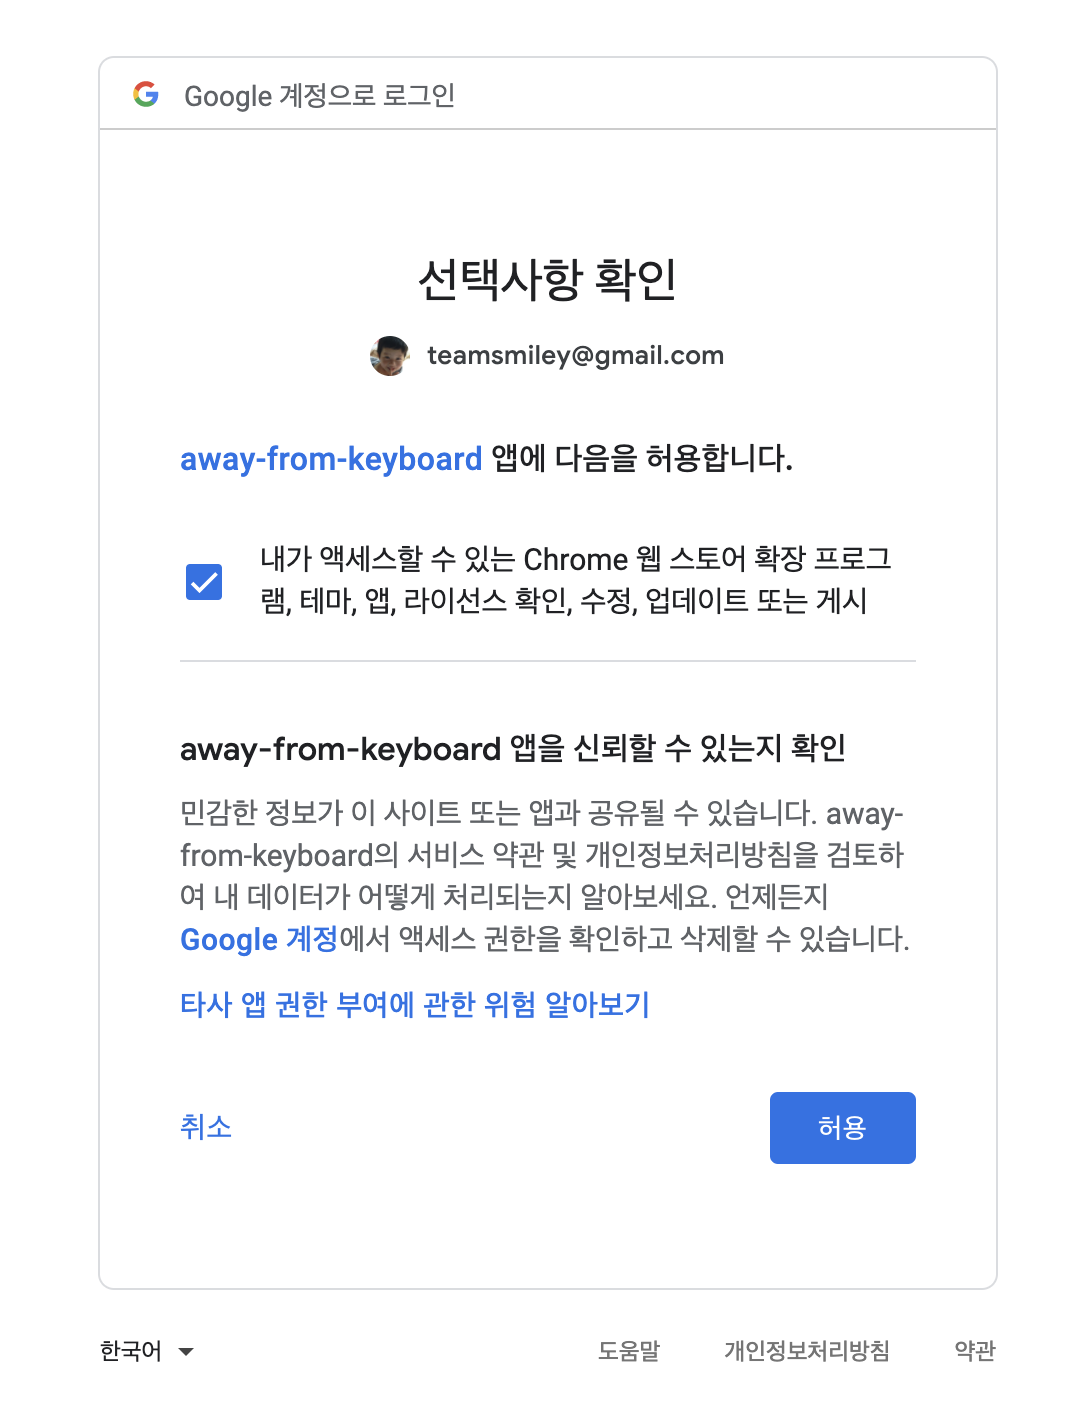
허용
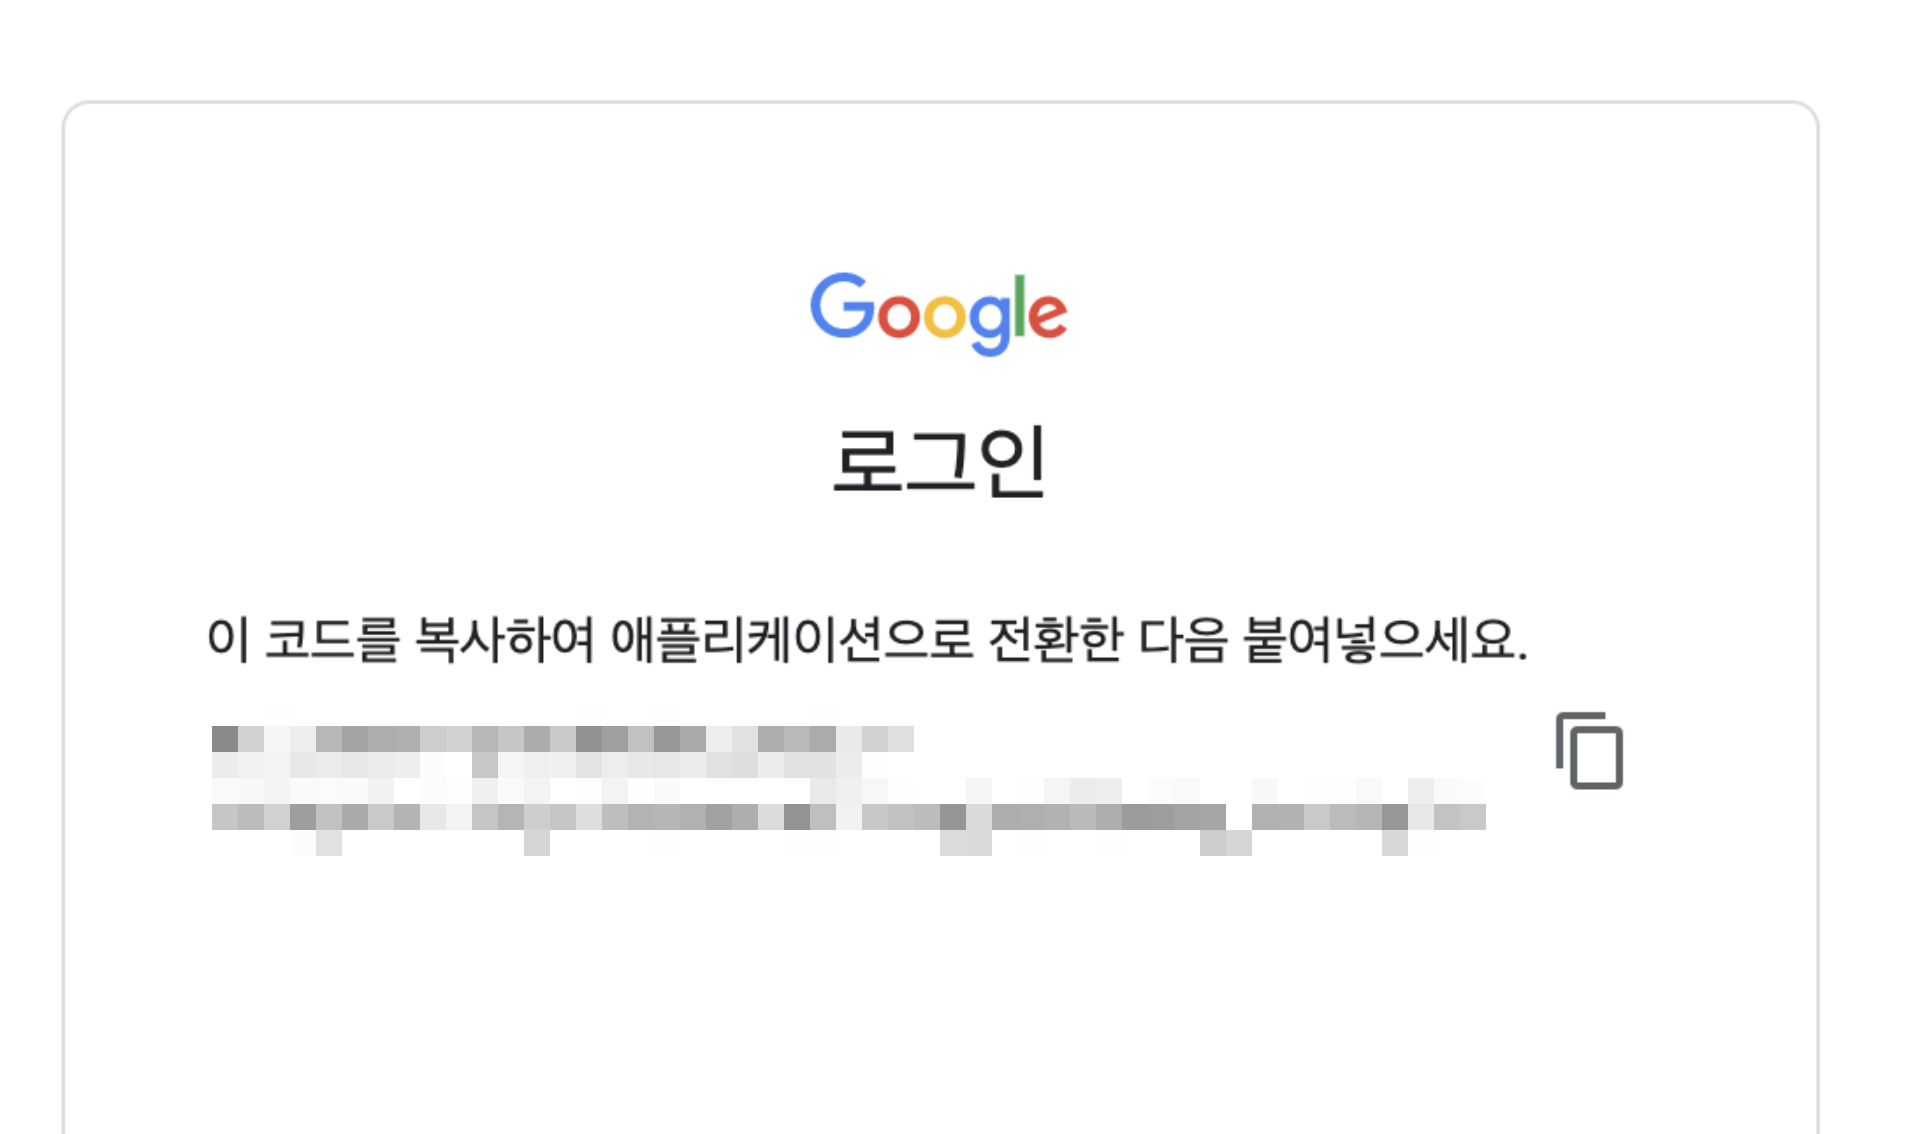
code를 받았으므로 이걸 추가해서 url을 호출해보자. 값을 모르면 들어가서 확인해보면 된다.
CLIENT_ID=XXXXX-3kl0jftkrn1.apps.googleusercontent.com
CLIENT_SECRET=oeMcFVqUqzJ_sOi
CODE=4/1AY0e-g7tdMche_HGb3-LT5QP1n12Djz3hUc

curl “https://accounts.google.com/o/oauth2/token” -d
“client_id=$CLIENT_ID&client_secret=$CLIENT_SECRET&code=$CODE&grant_type=authorization_code&redirect_uri=urn:ietf:wg:oauth:2.0:oob”
{ “access_token”: “rH2irju9D6N7QByjT9eWpZzZTLQPHnMWagD3OuWcYW2k4eXCAzh7cy4GivwTRp1hsqXjiT5rlp9Vx”, “expires_in”: 3599, “refresh_token”: “1//06uWcWWkVxYa0CgYIAj_gVr3YvfymU0GmTdWH0x5u0”, “scope”: “https://www.googleapis.com/auth/chromewebstore”, “token_type”: “Bearer” }%
여기서 refresh_token을 사용할것이다.
1//06uWcWWkVxYa0CgYIAj_gVr3YvfymU0GmTdWH0x5u0
이제 github action을 이용하여 커밋 푸시가 올라올때 압축해서 업로드하게 처리한다.
https://github.com/marketplace/actions/chrome-extension-upload-publish
이걸 사용하면 된다.
프로젝트에 다음 폴더를 만든다.
.github/workflows
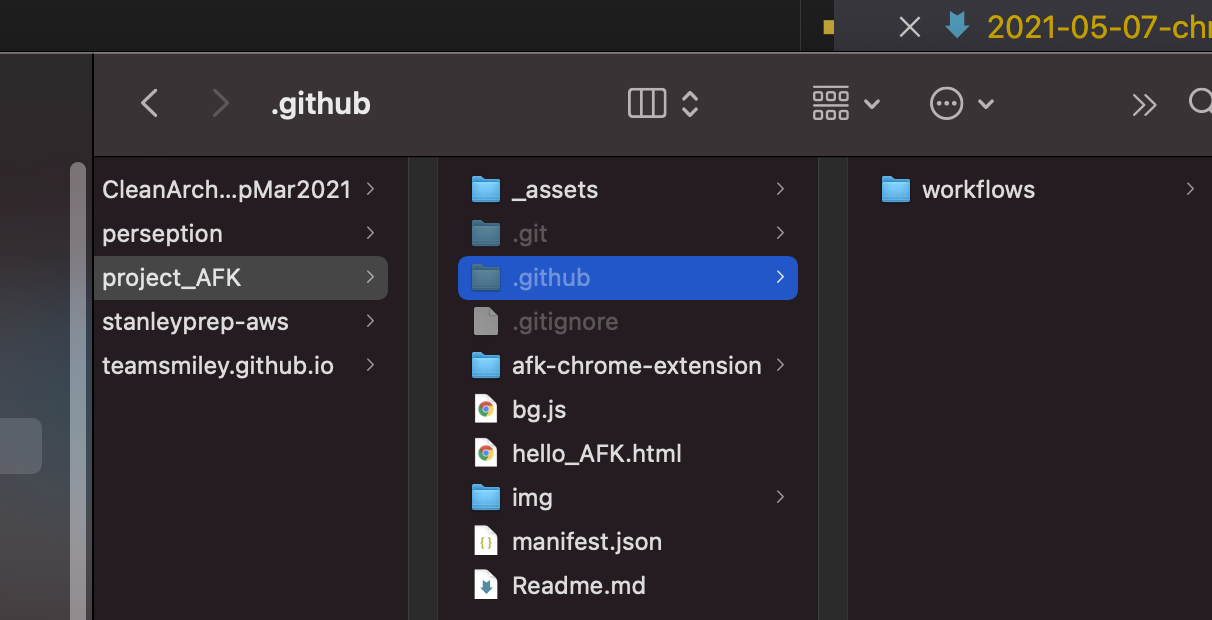
파일을 만든다.
vi upload.yaml
name: upload chrome web store

on:
  push:
    branches: [master]
  pull_request:
    branches: [master]

  workflow_dispatch:

jobs:
  build:
    runs-on: ubuntu-latest

    steps:
      - name: Upload Chrome Extension
        uses: Klemensas/chrome-extension-upload-action@v1.3
        with:
          refresh-token: 'xxxxxxxxxxxxxxxxxxxxxx'
          client-id: 'xxxxxxxxxxxxx'
          client-secret: 'xxxxxxxxxxxx'
          file-name: './extension.zip'
          app-id: 'xzc12xzc21cx23'
          publish: true
마스터 브랜치에서만 올라가게 해두엇고 workflow_dispatch를 적용하여 수동으로도 올릴수 잇게 해두었다.
app id는 chrome web store에서 알수있다.
chrome web store에가면 개발자 dash board로 갈수 있다.
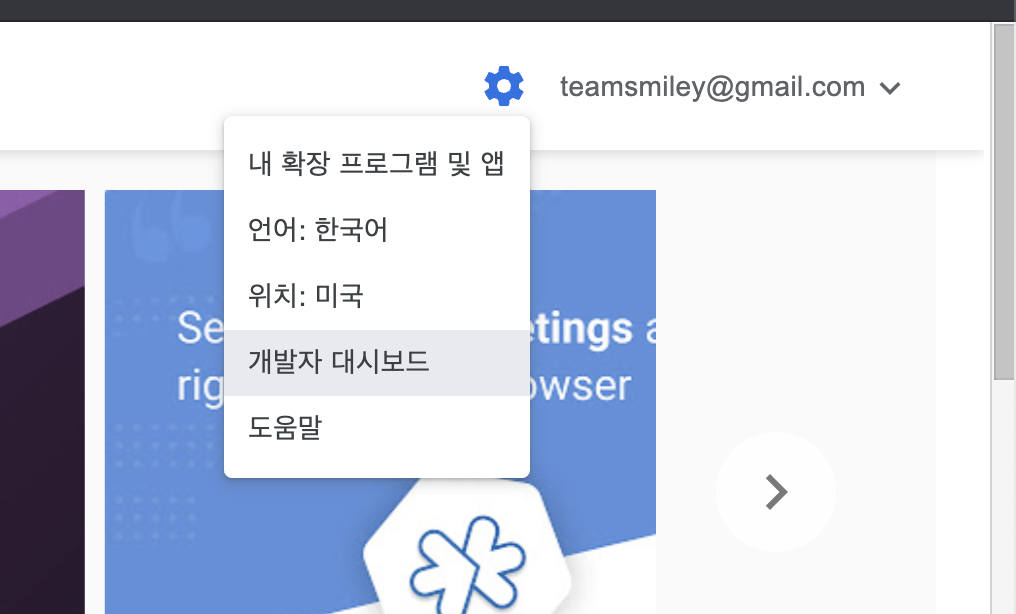
개발자 대시보드에 들어가서 항목을 선택하면

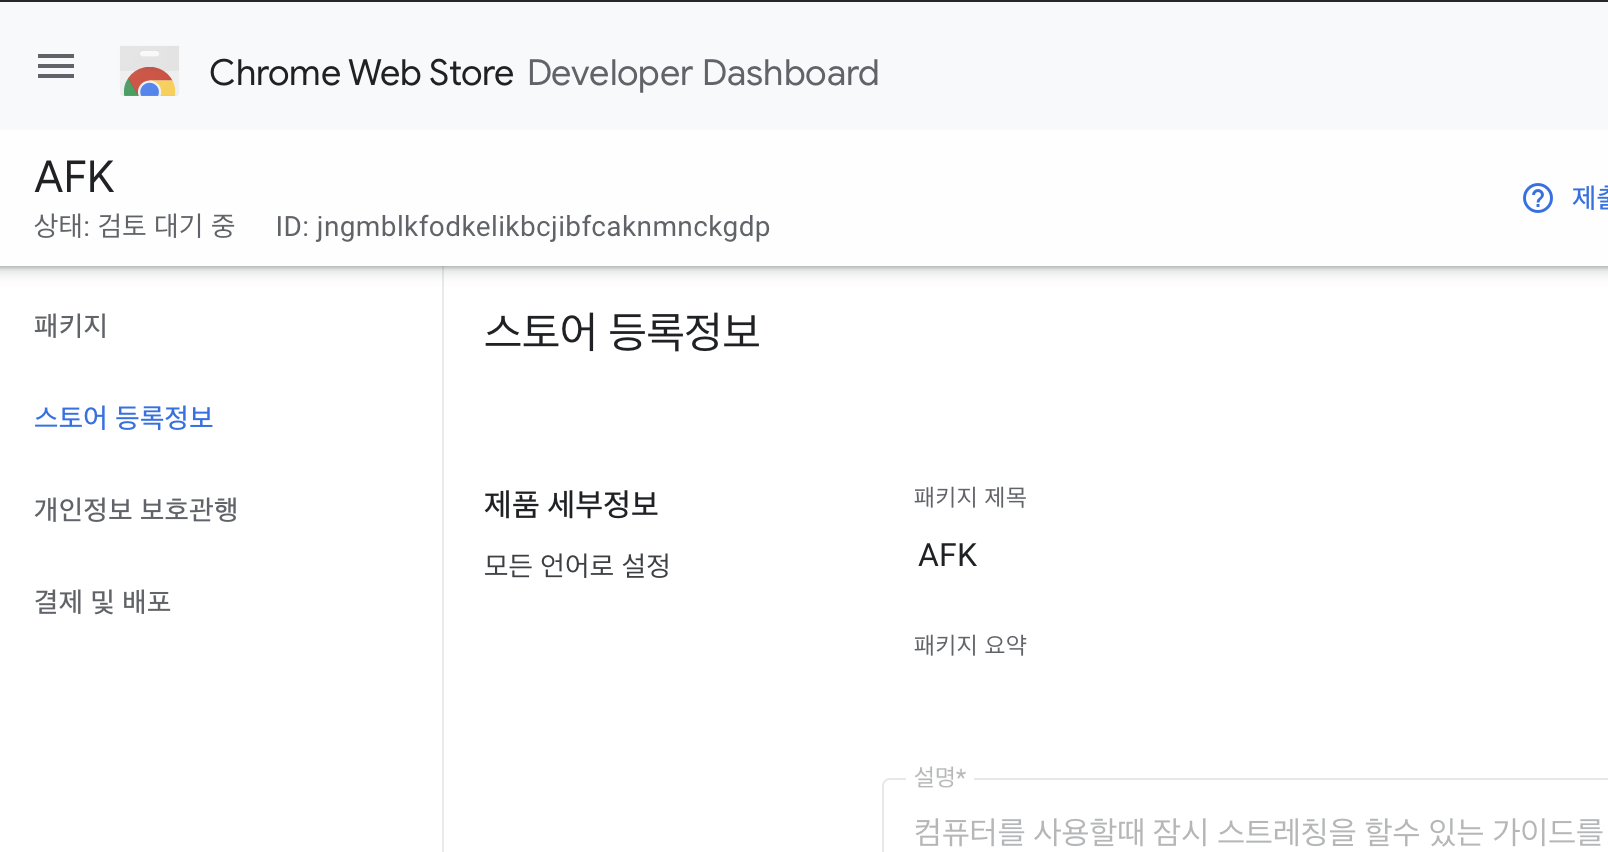
여기에서 app id 알수가 있다.
파일을 다 만들엇으면 업로드 깃허브 마스터에 머지해보자 업로드가 될것이다.
중요한것은 afk.zip을 업로드하게 되잇는데 이걸 로컬에서 만들어서 업로드후 마스터에 머지를 해주었다. 매번 자동으로 이걸 하려면 github action으로 처리하면 된다.
깃허브 액션에 가보자.
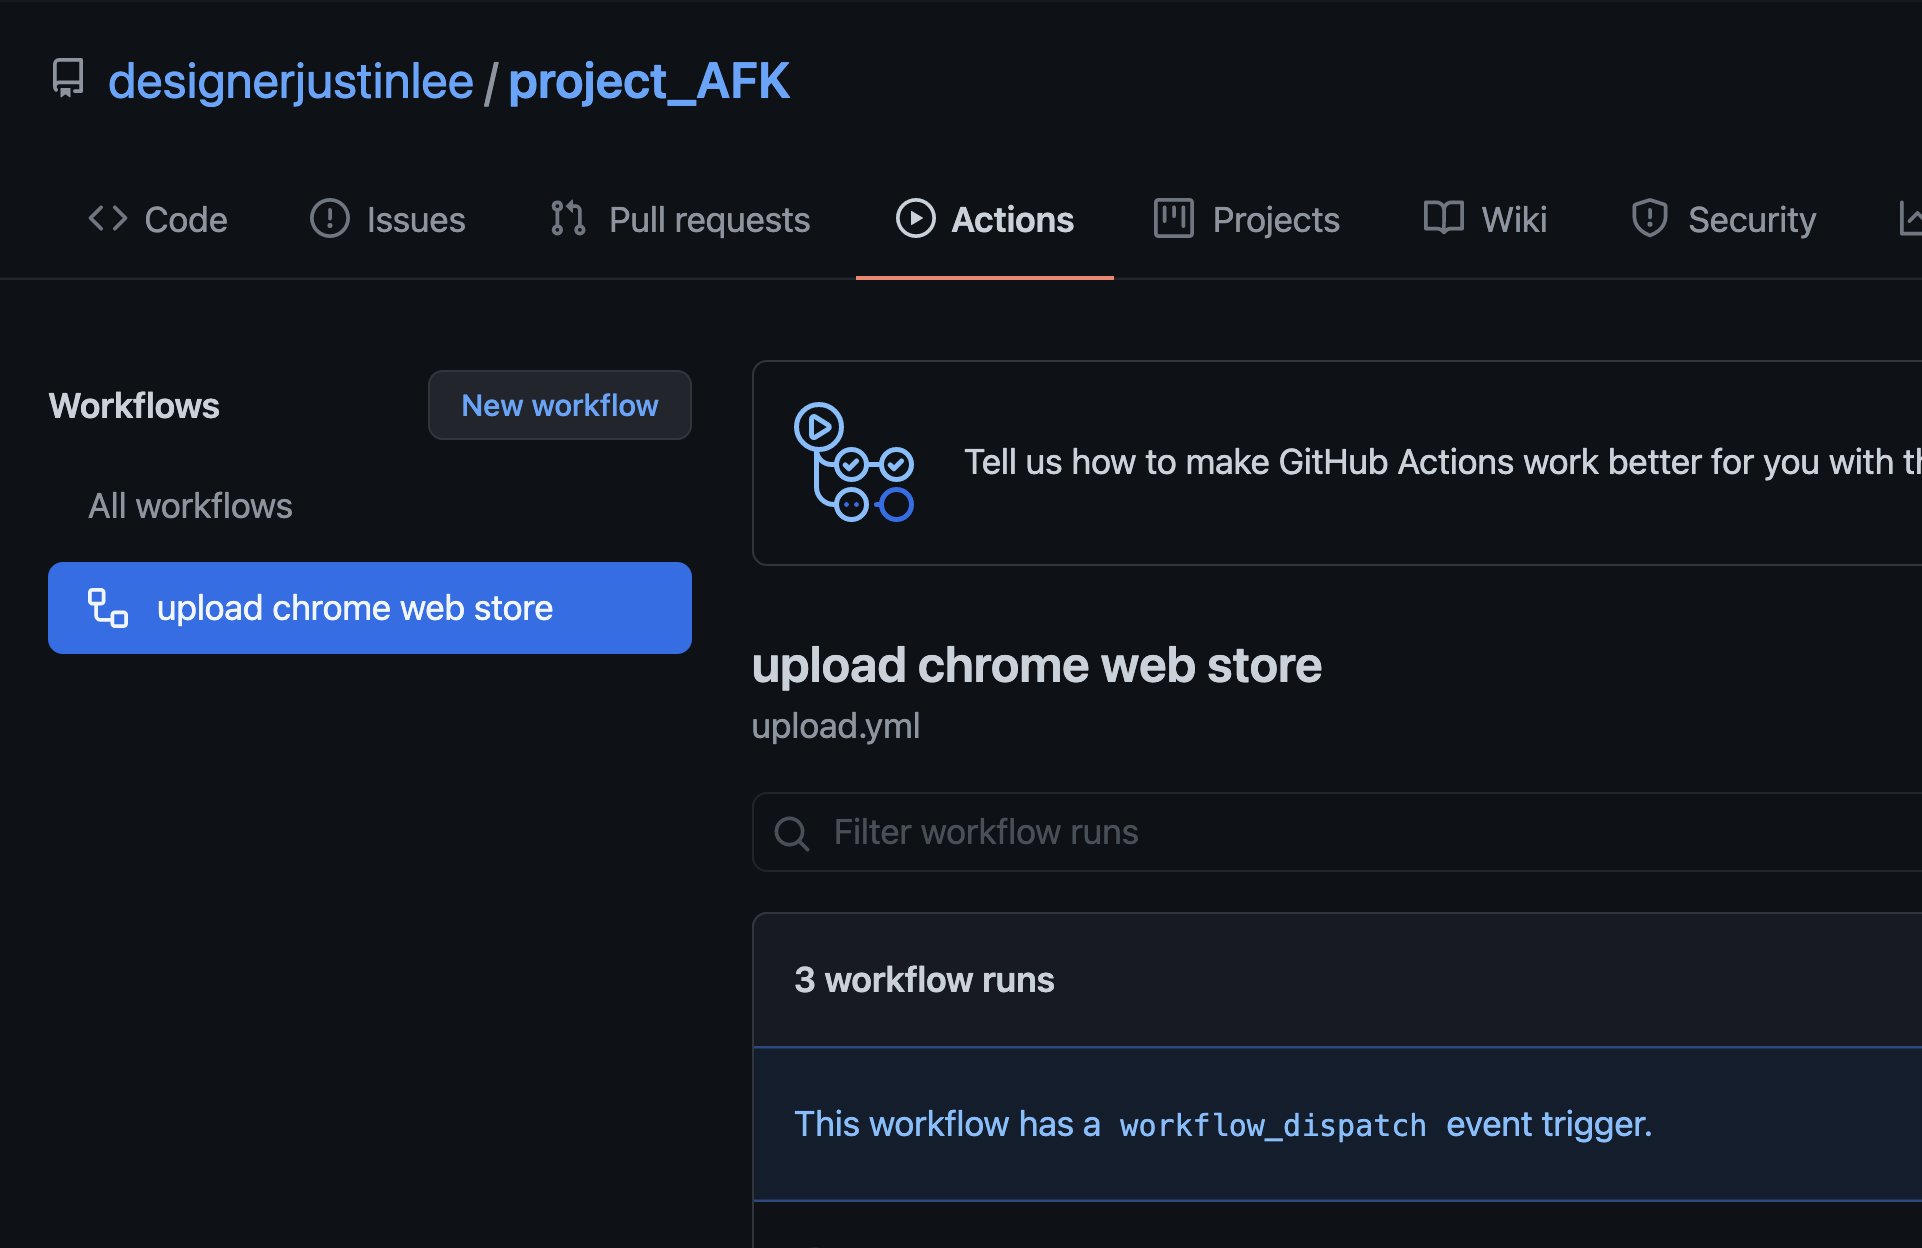
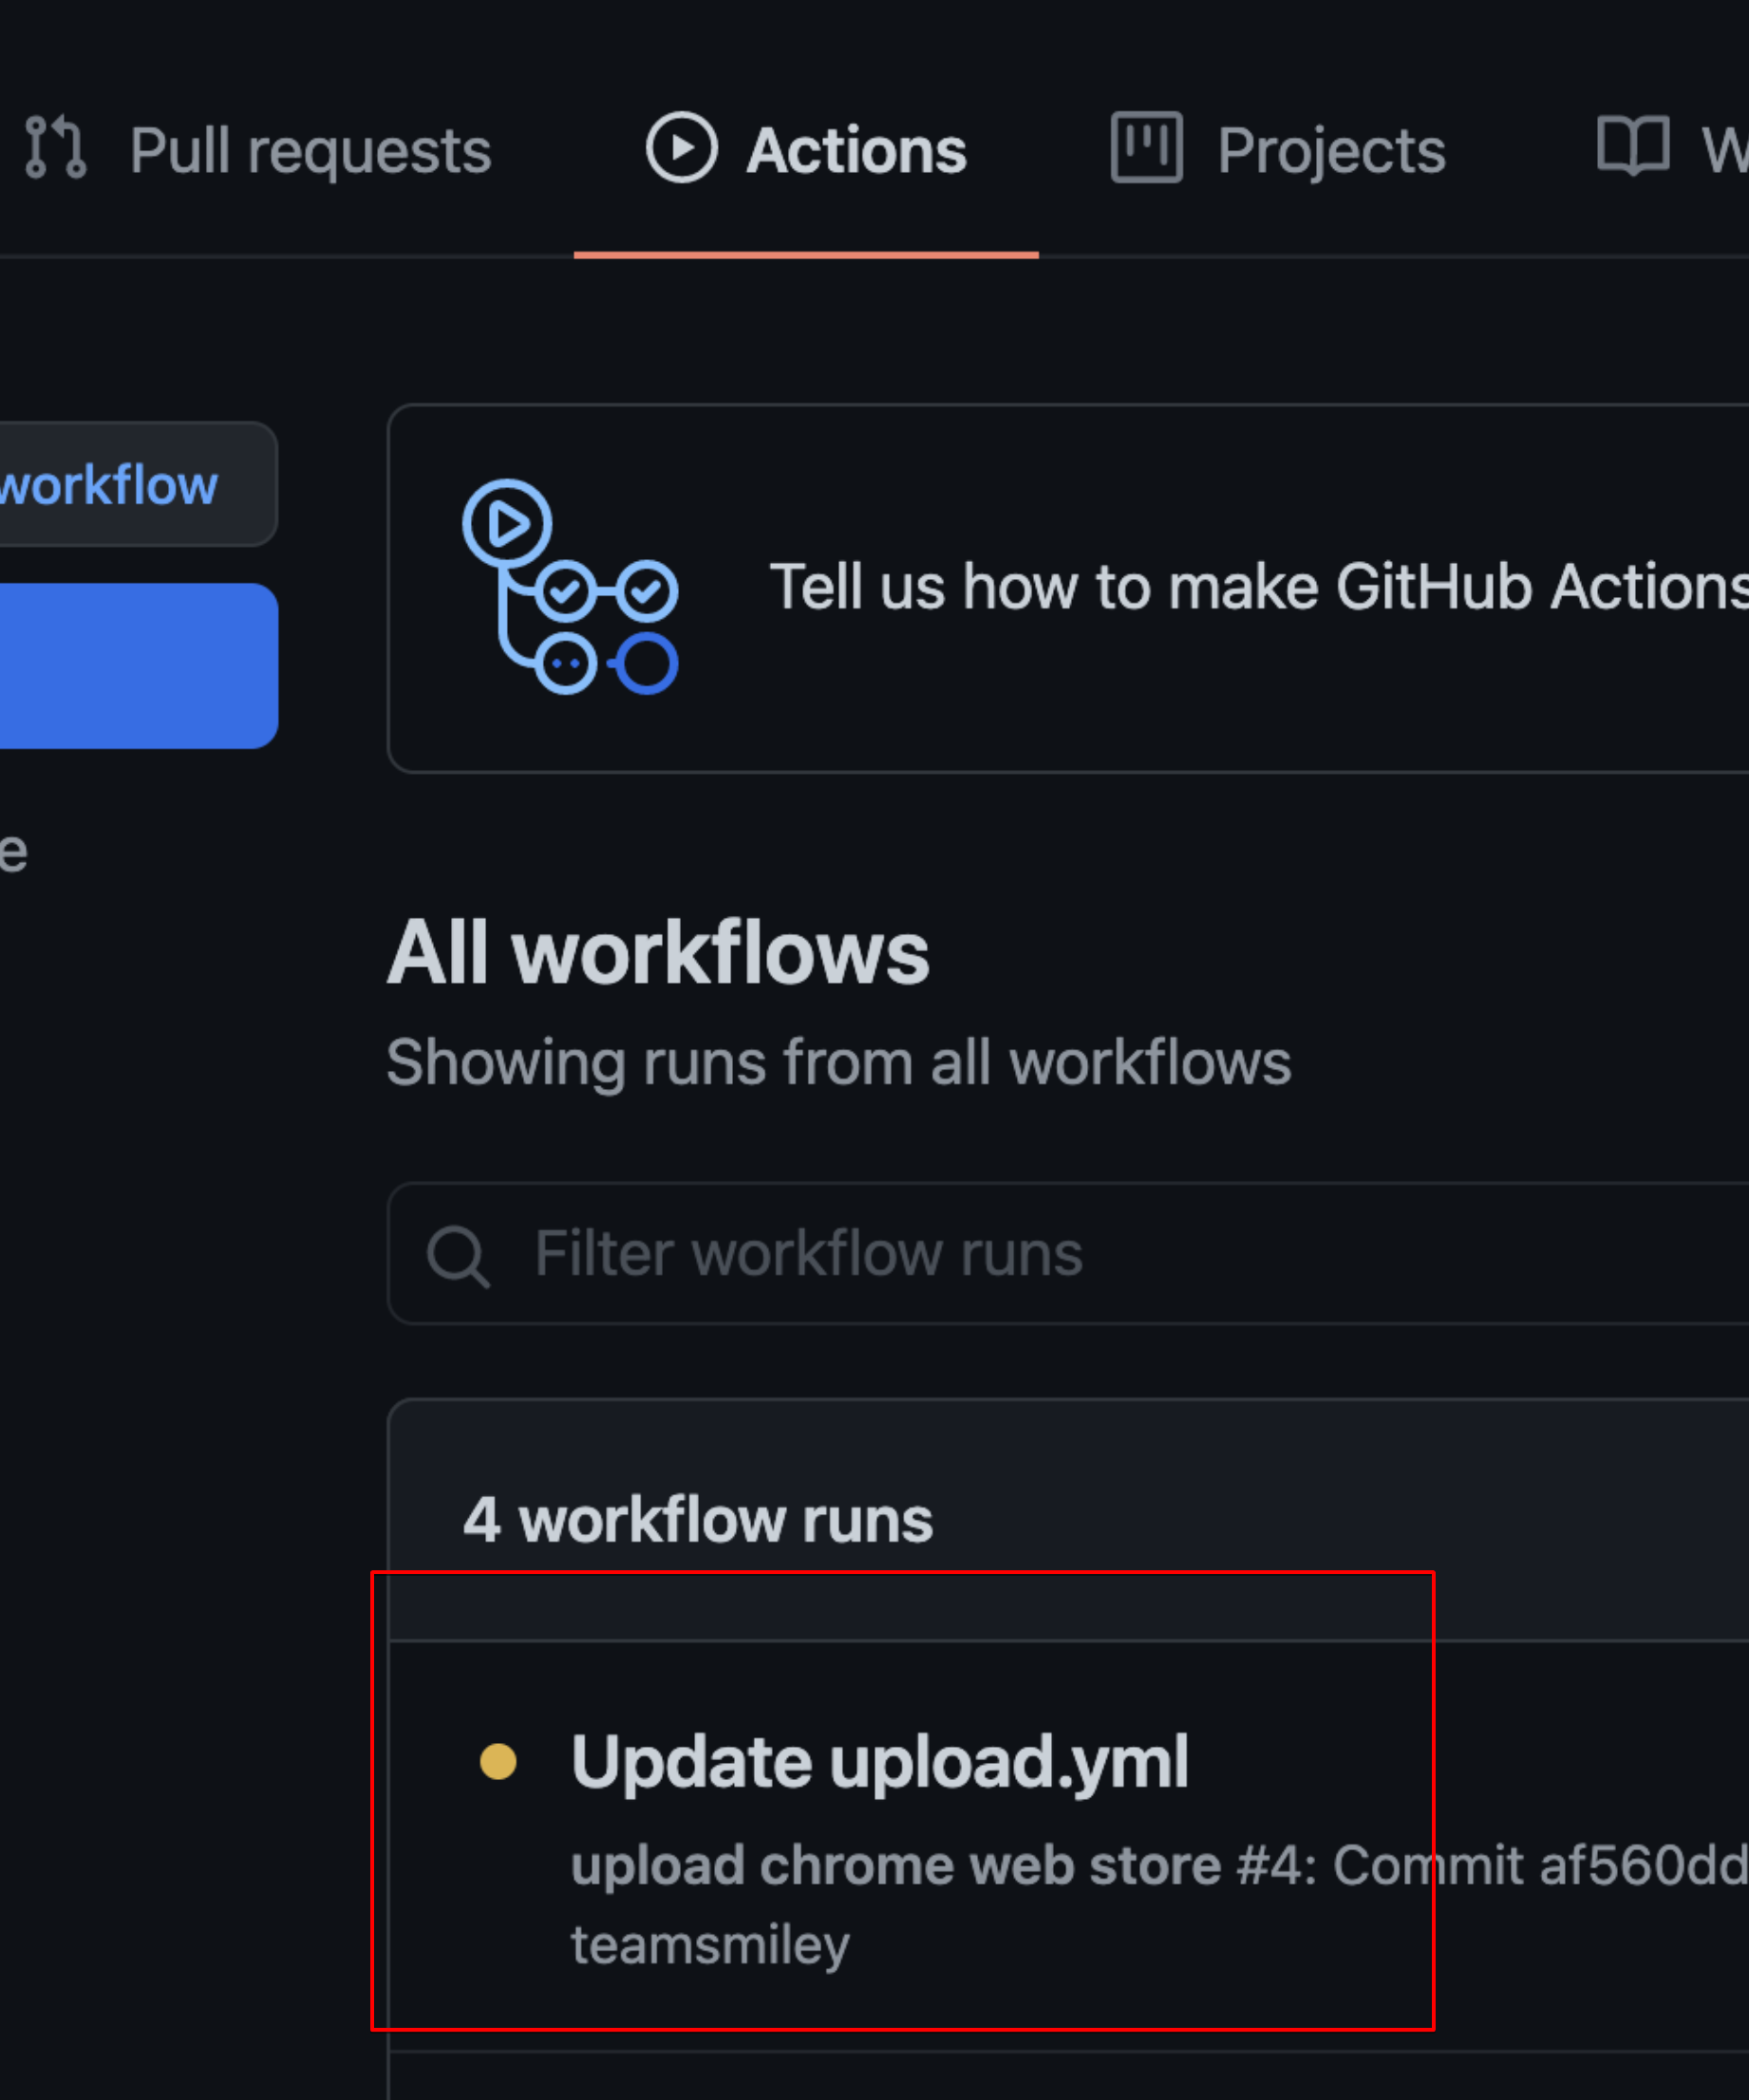
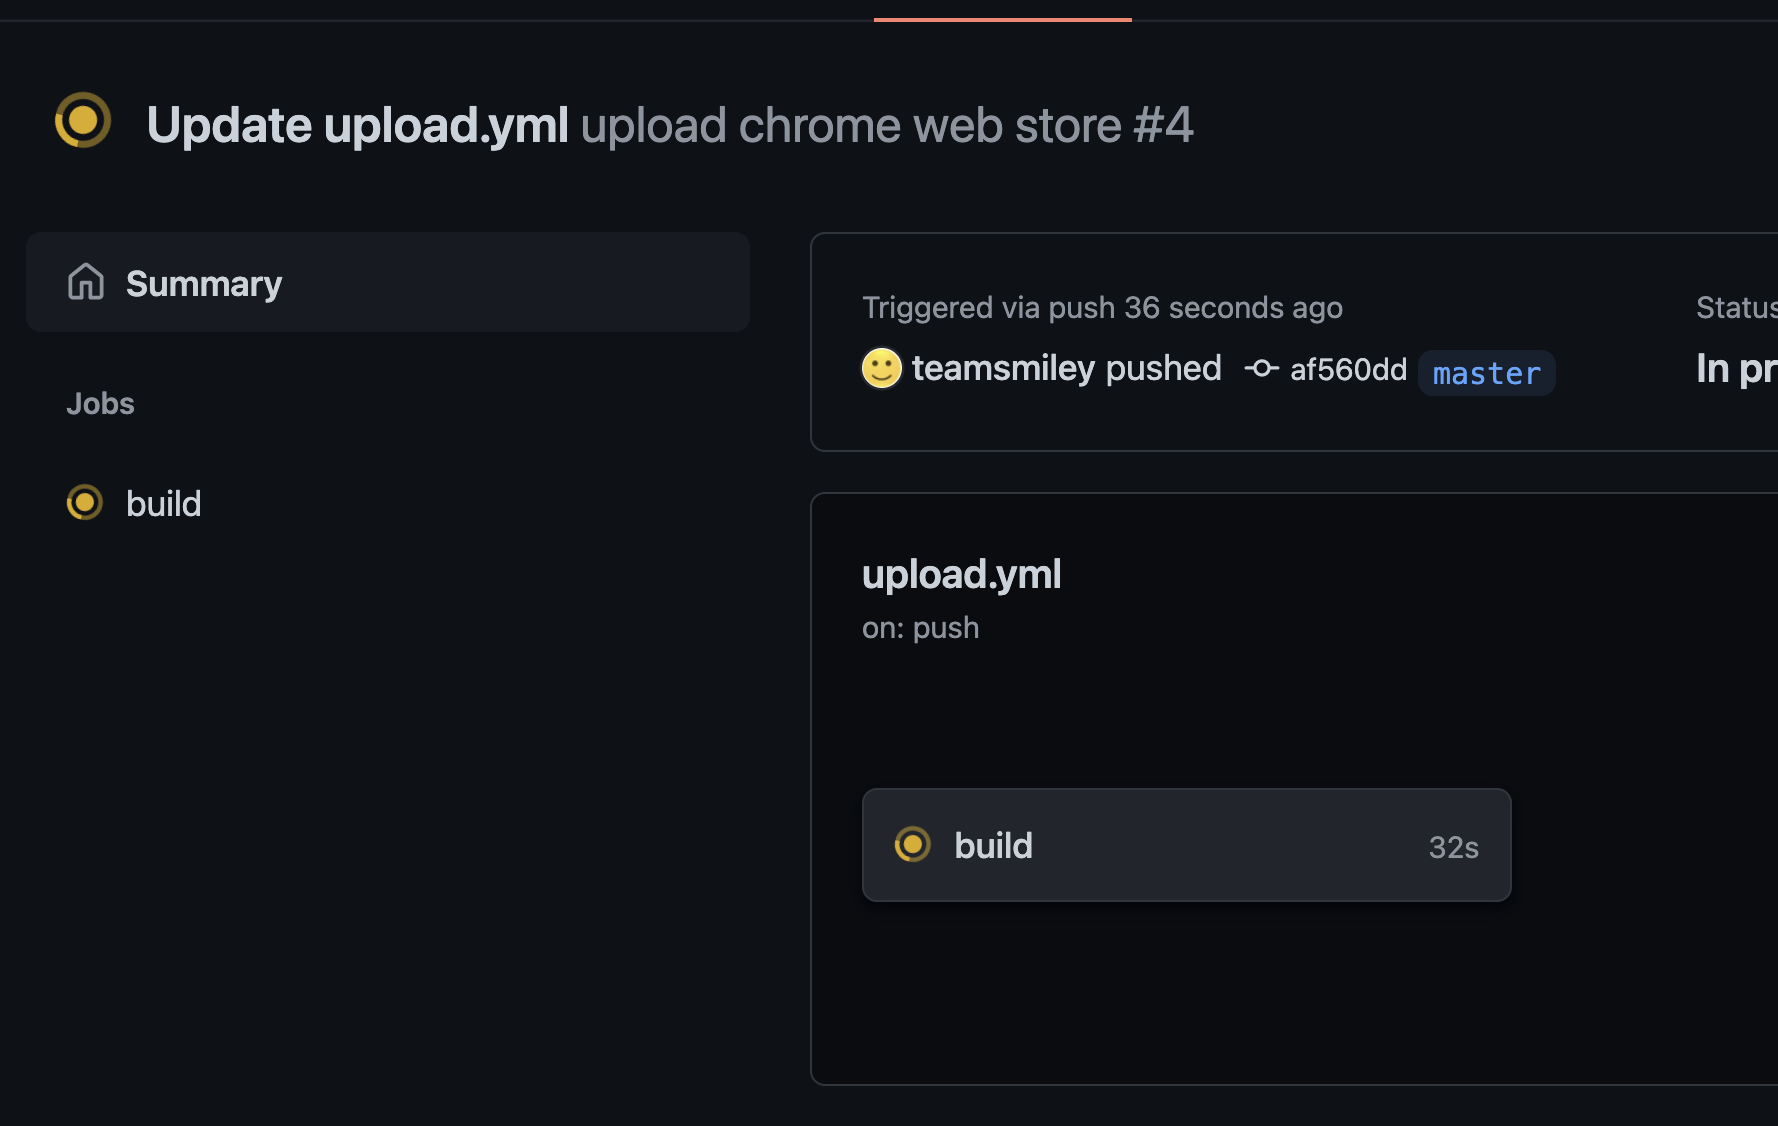
동작한다.
chrome web store 개발자 대시보드에 가면 업로드 된것을 볼수 있다.
맨처음에는 수동으로 업로드를 한번 해야 필요한정보등을 받을수있다.
![](/assets/2021-05-07-chrome-extension-deploy-02/before.png
![](/assets/2021-05-07-chrome-extension-deploy-02/after.png
자동으로 검수까지 요청하는것을 볼수가 있다.